Rose Hip Tea by Sakizou: Progress

Rose Hip Tea - Sakizo
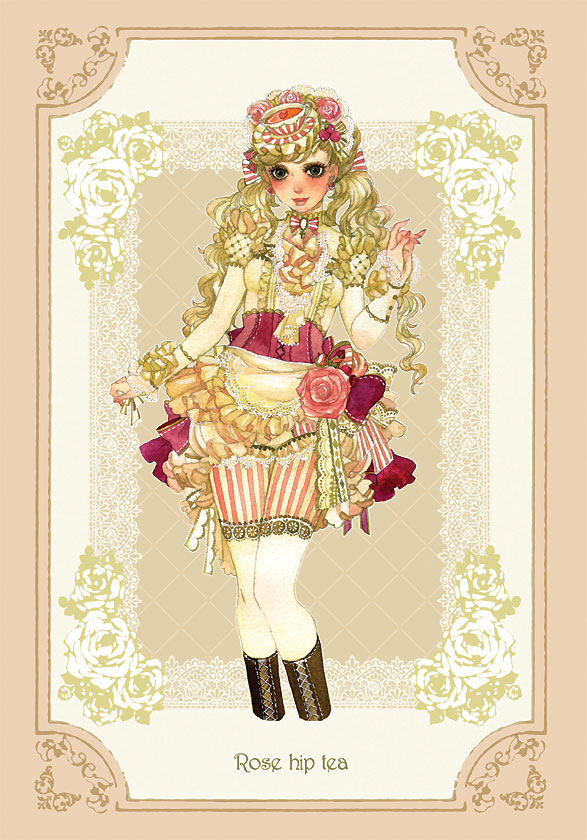
Rose Hip Tea is an original artwork character by the Japanese artist, Sakizo. She does amazing work and created these insanely gorgeous characters, often with a food, beverage, flower, etc. theme. They vary in style a bit, and the one I chose as my first attempt to create in costume has a kind of rococo victorian influence. I’m actually not really sure what the “correct” way to describe it is. :P

So the first thing I started working on / worrying about was the skirt fabric. I had to be that perfect pale peachy pink color and nice looking, however synthetic so I could do the scallops. After much searching and exasperation, I found some (pricey but worth it) polyester taffeta in the perfect color. It looks really nice despite being synthetic, and allowed me to use a soldering iron to cut all of the scallops on the edges. I used a small glass candle holder as a “stencil.” It was VERY stinky and probably bad for my brain cells and lungs (I used a mask but didn’t have a respirator like I should have). I did make sure to not breath it in too much without constantly getting fresh air. Anyway that was probably the coolest thing about this project!

There are 3 gathered layers to the skirt, the bottom being biggest and gathered tightly on the ends to make a bubble-ish shape. On the front of the skirt is simple apron made of ivory cotton sateen and hand-sewed trim with some really nice lace I got from Etsy. The skirt was then sewn onto a waistband with hooks and snaps for closure. To make it really poof up over my butt, I made a basic crescent shaped bum pad out of white broadcloth with tulle strips layered on top.

The main fabric for the shirt is an ivory cotton jersey with a nice sheen to it. The front decorative piece and sleeve ends are ivory cotton sateen and various laces I had around. The rick rack and other brownish trim was originally white, and I colored it with a brown/gold sharpie by hand (was synthetic and I didn’t feel like buying poly dye. This may have been a huge mistake, I’ll find out when I wash it haha.) The rose motif lace around the wrists I also ordered from Etsy. The sleeves I quilted myself out of the ivory cotton sateen and batting. For the ruffles over the sleeves, I “hemmed” it with a tiny sulky brown satin stitch, using stabilizer to help. (Could have used my serger to make it easier I guess, sometimes I don’t know why I do the crazy inefficient things I do). I dotted the diamond corners with brown Swarovski crystals, alternating shades a bit for more interest. The rose buttons I found on clearance and painted gold.
Continue reading “Rose Hip Tea by Sakizou: Progress”

Super Sailor Mercury: Progress

SuperSailorMercuryMercury/Ami has always been by favorite sailor moon character, so its crazy that I only just recently made her! I get better and better every time I make fukus, this is my 4th one. Its not 100% perfect, but I’m really happy with it! For this version I chose to make it with the old anime look. As in, pleated skirt and not too much shiny going on.

To start I finally got hold of the infamous Green Pepper ice skating pattern. I modified it by extending the back up to my neck. I also initially modified the separation between the midsection and bottom, then had to go back to the original pattern line since it didn’t look right on me. I separated the top chest armor from the midsection and cut 2 copies, plus a copy in standard white fleece. Basically what they do in the Cupcake Cosplay fuku tutorial. I used white matte moleskin. The various rolls were all made by rolling up tubes of fleece for stuffing, rather than polyfil. This made it way easier to sew and much smoother. The sheer stuff on the sleeves is scrap white organza.

The collar and skirt are made from cotton sateen. They are pretty standardly made like all my others. The skirt fabric is folded so there is no need to hem. After I pleated it all I held it up on my waist and pinned the line where I wanted the V to sit. This is basically where I made the decision to make it super short and sit high-ish on my waist. It’s dangerously close to being skanky, but at the same time, much more accurate since they have super crazy long legs and pretty much no pelvis. I think it turned out great in the end and will probably make all my future fuku skirts this short. :P

My bows are made from leftover cornflower blue (now discontinued) Casa satin from my Cinderella costume. The broach is made from worbla, shaped with a heart pendant from Forever 21. The tiara is also made from worbla, primed with gesso and pretty easy to make. The boots I found on clearance and painted with perfectly colored leather paint that I just so happened to have leftover from my Sailor V shoes. The visor I got from Etsy. I saw it before I made the costume and it was part of my inspiration to finally do it! They are pretty awesome.

I got some great shots at the conventions I’ve worn it to so far, check them out!

Lady Amalthea from The Last Unicorn: Progress

Lady AmaltheaI used to be obsessed with The Last Unicorn when I was a kid. When I heard they were doing a movie tour recently, I HAD to go, and in costume of course!

This costume was pretty easy to make- it’s a long off the shoulder princess seam dress. For the sleeves I just draped fabric on my arms and left the opening really wide, which I gathered to make the poof. The stripes on the front are Wonder-Undered pieces of purple ribbon that I satin stitched on the sides. The pockets are real and the edges are lined with the same ribbon. The top is covered with a pinkish bias tape and finished with lace. The main fabric is reversed (to avoid the shine) discontinued lavender Casa satin. It is lined with a cheap lavender cotton broadcloth.

For structure there is a cotton, plastic boned bodice connected at the top seam and armholes. A chiffon petticoat is connected to the bottom of the inner bodice (to avoid an outer seam at the hips). The wig is a white Persephone from Epic Cosplay. I just had to curl the ends.

See my gallery of the final product here!

Cinderella Costume: Progress

Cinderella CostumeI made a Cinderella costume for a Children’s Hospital of Atlanta volunteer visit, and plan to wear it to future events (both for volunteering and conventions). Cinderella’s dress looks daunting because of all the material involved, but its really pretty easy.

What really helped was having a great pattern. I forgot to take but a few progress shots because this was one of those crazy whirlwind projects of mine! For the most part I followed this Simplicity pattern I got in a $1 sale. The skirt (separate with a hidden zipper and a hook closure) is pretty much the same as the pattern. I used a tiny rolled hem to finish it. For the bodice I just used the main part without the pattern’s sleeves. I did shorten it a couple inches I think. It is also self-lined with plastic boning. The white sleeves are cotton tubes stuffed with Polyfil with gathered satin casing that I machine sewed onto the bodice on one side, and hand sewed underneath. I added hooks to keep the bodice connected to the skirt. The white side poof things are just semi circles with pleats. The blue fabric is a discontinued powder blue Casa satin, and the white is a bridal satin from the remnants pile. Despite how big the dress looks, I think I only used around 5 yards of the main fabric.

Underneath I have a hoop skirt for structure. I used this tutorial, except without all the math. Its not very clean since I made the measurements up, but does the trick! I also made a chiffon petticoat to go over it. I will make a thicker tulle petticoat in the future.

The wig is a Dark Ash Blonde Jeannie from Arda Wigs. I just didn’t attach the long poytail, and used the short existing one to pin up into a bun. I cut the bangs and left them long on the sides to pin over the hairline. The headband is a strip of blue satin lined with pearls and glued to a headband, with buttons glued on the end. The necklace is just a strip of velvet ribbon with snaps sewed on. My shoes are tacky glitter plastic jelly shoes I found on clearance, but the kids loved them. ;)

“Historically Accurate” Merida: Progress

drawing
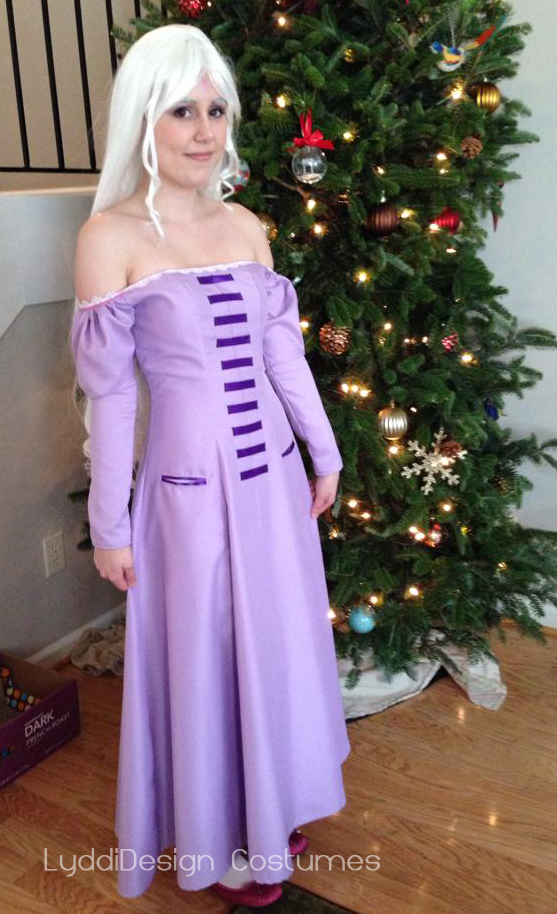
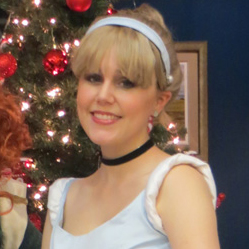
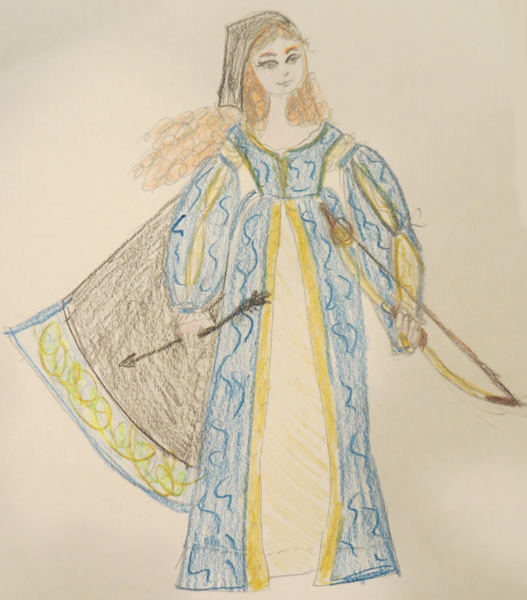
I love Disney princesses, like… woah. I’ve always wanted to be one, and I finally did it for AWA! But of course I had to complicate things and made an original, not accurate, version for my first one. :P

There’s a lot to say about this costume. It started out with me loving Merida, and loving crazy red hair and freckles, but not wanting to do a costume that’s so incredibly overdone right now. Her everyday dress is okay, but its actually kind of boring (blasphemy! I know). One day I was at the ren fest, and I saw this gorgeous red rabbit pelt at the fur stall, and I thought, wow, this is so Merida! I knew then that I had to do some kind of alternate version of her. The other princesses had “historically accurate” fanart, why not Merida, too?

I started out trying to research the time period of the movie. No luck, and apparently other people had the same problem. The architecture and dresses and materials and just everything in the movie is a mish mash of time periods, so I had to make something up. I also had a difficult time pin pointing specific Scottish fashion. Seems that they wore the same clothes as their European neighbors and nothing super specifically Scottish. (My sources are Google and Wikipedia mind you, I’m not part of the SCA or anything like that to get super secret historical accuracy information, maybe one day). So I left it alone for awhile.

lucrezia_borgia
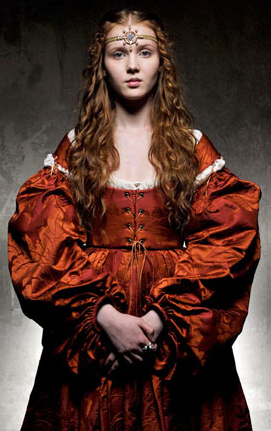
Then I saw the show “Borgia: Faith and Fear”, and I beheld Lucrezia Borgia. She has curly red hair and immediately reminded me of a proper Merida. And her dresses are very similar if you look past the fine fabric and poofy sleeves. Just looking at this picture, I thought, this is it! This is my version of Merida! And that time period is 15th/16th century, the clothing Italian. And since the Scottish at this time wore whatever generic European fashions were around, this could have been something Merida would have worn, assuming Brave takes place somewhere in the 1400-1500s.

danielle_everafter
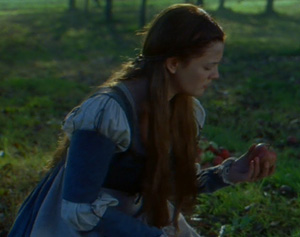
Still not convinced? Look at this picture of Danielle from Ever After. Yeah, that is almost the same exact dress Merida wears, and its from the same time period.
Continue reading ““Historically Accurate” Merida: Progress”

Chibi Chibi Schoolgirl: Progress

chibi-chibi-schoolgirl
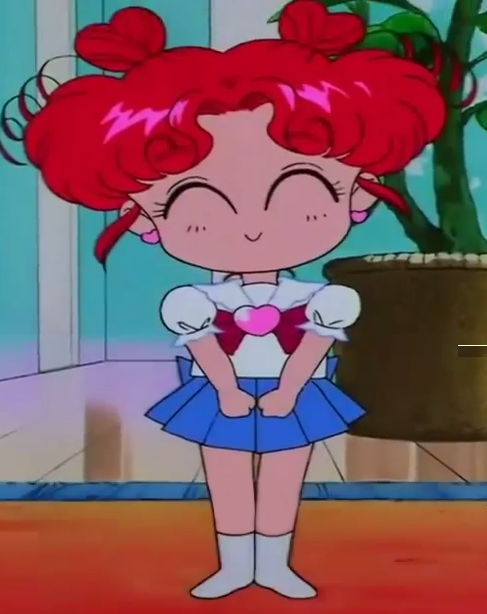
I made a super duper last minute decision to attend J-Con, a new small convention hosted at KSU. It was the weekend after AWA and I was feeling super post con blues, and also really wanted to get back to sewing! I knew I wanted to do Chibi Chibi’s casual schoolgirl outfit at some point, and this was a perfect opportunity since it was such an easy project.

There’s not much to it since its so simple. I did take a few progress pics, but honestly its not far off from my Sailor V costume, just much simpler. I didn’t bother finding a pattern or making a mock for it since I just wanted to crank it out ASAP. I cut out a square of fabric out of convenient leftover kona cotton and somehow crafted a basic shirt shape out of it. I used the same poofy sleeve pattern I use for everything. The collar is white cotton sateen I already had because I ran out of kona. I accidentally made the shirt too short (lol boobs) so the extra wide bias tape lining the bottom was an attempt to lengthen it an inch.

The skirt is exactly the same as my Sailor V skirt, but with larger pleats and a center pleat in the front. The bottom edge is clean with no hemming because I used the natural fold of the fabric, basically doubling the fabric. Doubled kona cotton pleats well! Plus I added the bow in the back.

The red bow is the same one from Chibi Chibi’s fuku. The heart broach is the one that I meant to use for her fuku version but got knocked under the couch by my cats and couldn’t find for Dragon Con. I reused her wig, but couldn’t take off the odango shields… because glue! :P Sorry for so few progress pics, I was working too fast to remember to take more!

Sheogorath from Oblivion: Progress Part 2

Finishing the embroidery on this was such an amazing and relieving feeling. *_* Now I could finally start putting it together and seeing progress! I carefully sewed the embroidered pieces together, making sure to check how the seams were done in the source. Some had satin stitching along the seam to hide it (shoulders, sleeves, etc) and the sides actually had gold satin covering them. I added thicker interfacing for the collar pieces.

I chose baroque gold Casa satin as my gold secondary fabric. I really REALLY hate satin, but in the end I felt this was the right choice. Story time! Back in high school when I discovered how to manipulate HTML and CSS, I used to make terrible websites. I would go to background swatch sites and use those everywhere. I remember that the satin swatches had the same odd ripple to them as Sheogorath’s gold parts. So yeah, that’s how I made the connection. :P Turns out satin was a bad idea because it already started snagging during Dragon Con. Oh well. x_x
Continue reading “Sheogorath from Oblivion: Progress Part 2”

Sheogorath from Oblivion: Progress Part 1

Sheogorath
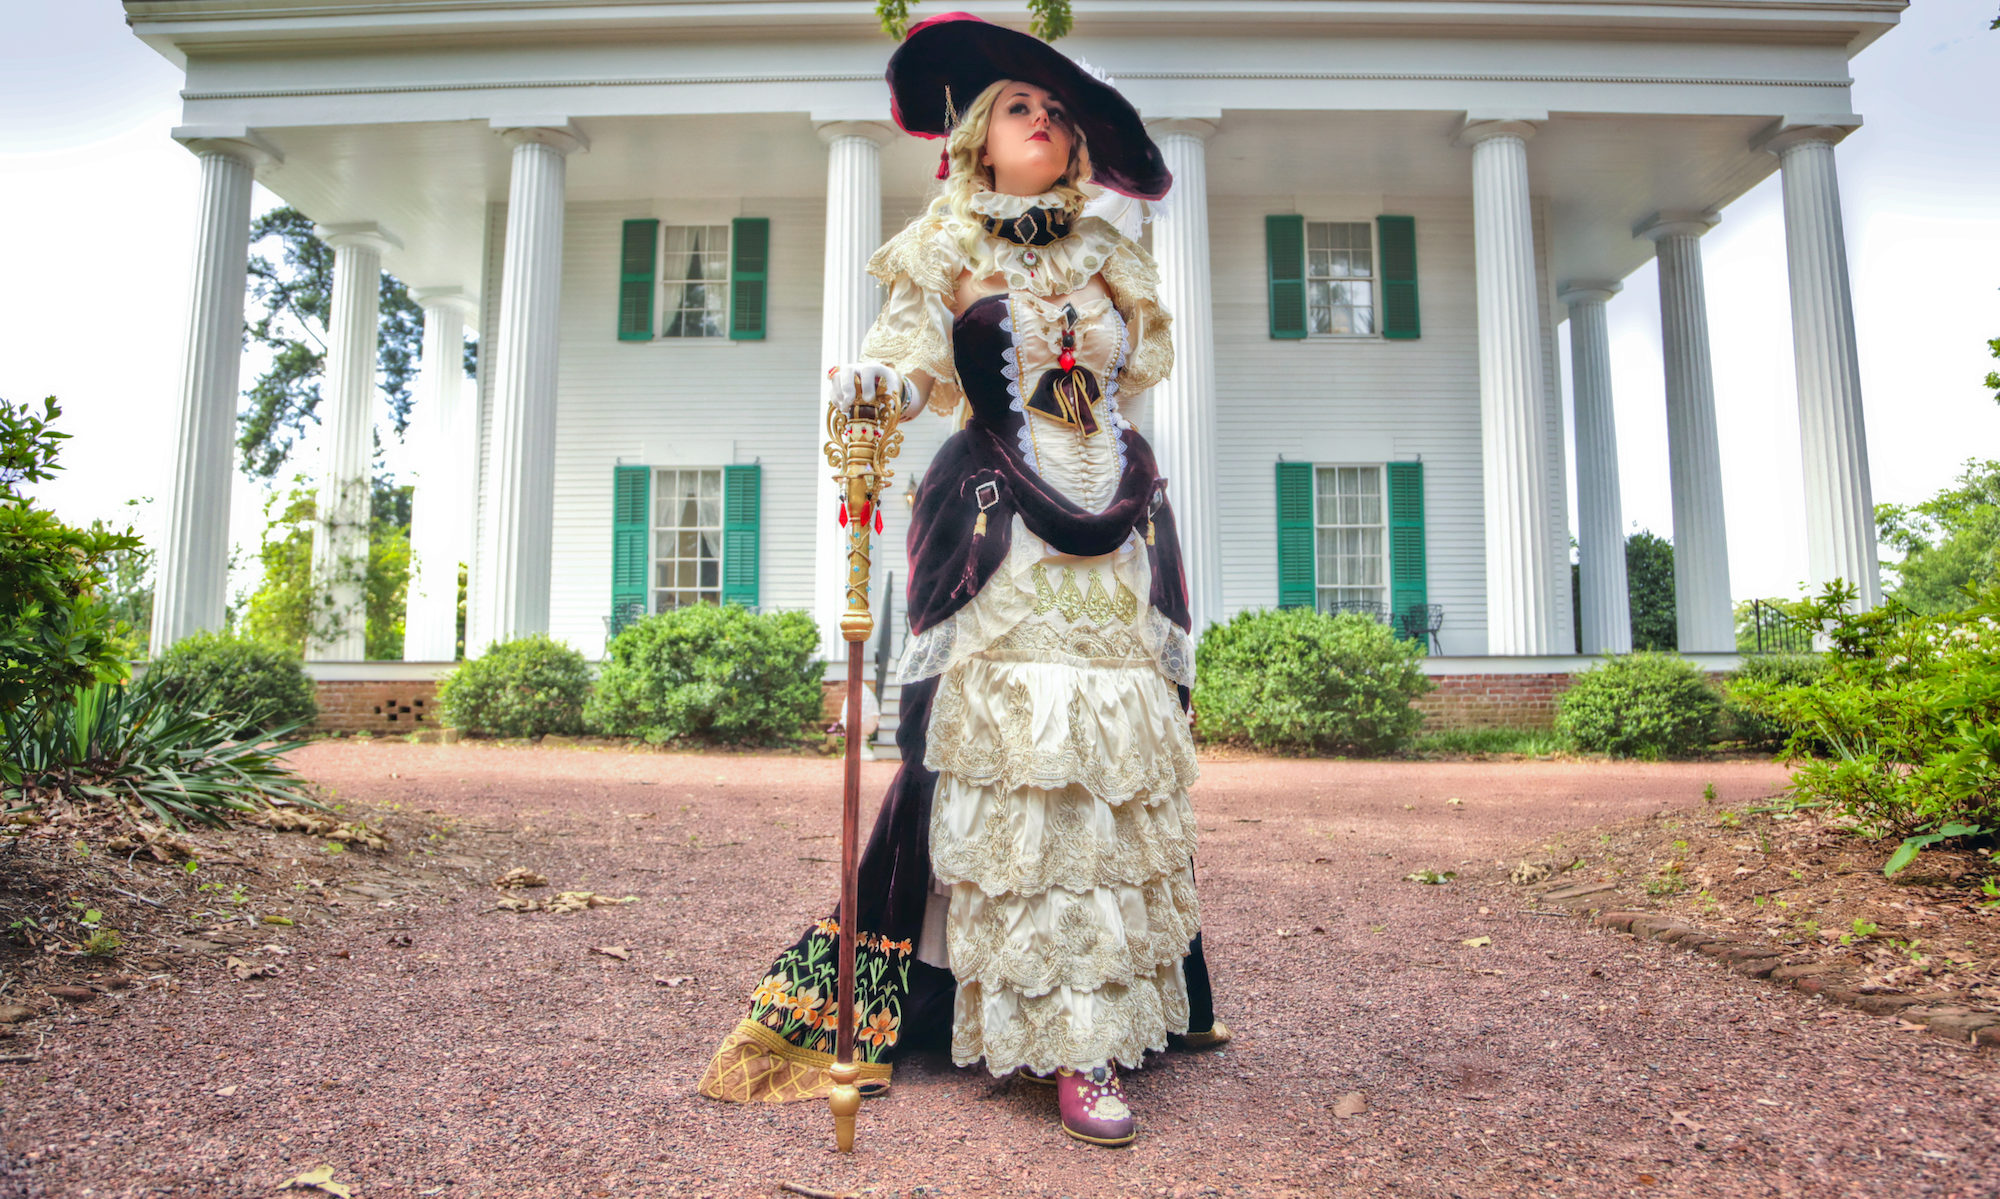
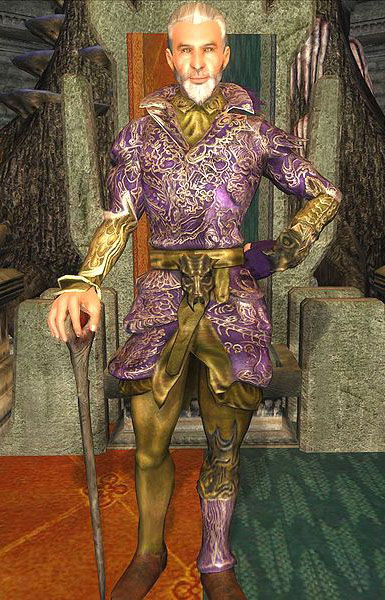
I have been wanting to make Sheogorath’s regalia ever since I first played the Shivering Isles expansion for Oblivion (Elder Scrolls IV). It is obviously very complicated and a huge undertaking, so I could never really give myself an excuse to do it. However last year when trying to figure out what my big costume would be for Dragon Con and the Friday Night Costume Contest, I remembered this awesome outfit.

I wasn’t sure at first since he is an old dude, and I’m not old, or a dude. But then I envisioned myself wearing a long flowing silver wig and fancy makeup, and I finally decided to do it! This costume is technically “genderbent.” However it is also kind of canon to the Elder Scrolls lore. I’m not super into genderbending characters (I really enjoy when other people do it, but I feel kinda odd doing it myself), so it was important for me to tie it in with the lore. Every now and then in the games it is mentioned that the daedric princes choose which gender form to take on, and sometimes switch between them [source]. I thought who better to try being a lady than Sheogorath? If you know him it TOTALLY fits his character xD. I did want to create the outfit accurately so the only thing I really changed was my face and hair, the rest of the outfit is exactly the same as his.
Continue reading “Sheogorath from Oblivion: Progress Part 1”

The Comstocks from Bioshock Infinite: Progress

comstocksWhen I played Bioshock Infinite I thought I was totally going to cosplay Elizabeth. I took lots of ref shots as I played, but I was also fascinated with Lady Comstock’s outfit as well. Her’s is similar to Elizabeth’s, but in a more classy Victorian lady kind of way. Eventually my boyfriend, Andrew, said something like “Hey I should cosplay Comstock because I have a beard.” And it began, I was determined that we would be the Comstocks!

These costumes are pretty straightforward. I rushed most of the pieces and didn’t remember to take as many progress pics as I usually do, sorry! Funnily enough, I actually busted my butt to make a grey suit for Comstock, and I ended up hating it. The fabric was polyester, worst decision ever! I couldn’t press it without it melting, ugh. So I re-made the whole thing out of a bottomweight black cotton fabric, and I think it looks soooo much better. I did this the week before my shoot so I had even less time to take progress pics.
Continue reading “The Comstocks from Bioshock Infinite: Progress”

Sailor Chibi Chibi Moon: Progress

Sailor Chibi Chibi Moon
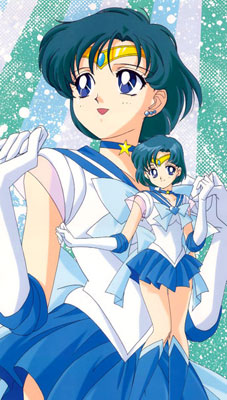
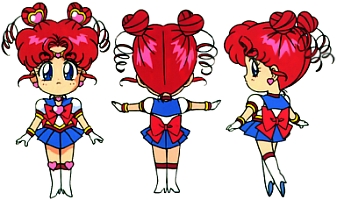
I was part of a super huge Sailor Moon group at Dragon Con, and I decided to be Chibi Chibi Moon! Her outfit is a pretty standard Sailor Scout fuku, just with 2 color double rolls and hearts everywhere instead of circles/stars.

I started with a basic McCall’s one piece swimsuit pattern and modified the neckline. I used very nice thick white matte moleskin. Since Chibi Chibi is eternal, I didn’t have to make chest armor, but I did make my own inner lining with swimsuit boob cups so I wouldn’t have to wear a bra. I made and sewed a basic navy cotton sateen color to the neckline. The sleeves are white cotton sateen made from a Dorothy pattern, finished with the yellow and red double roll cuffs, also cotton sateen.
Continue reading “Sailor Chibi Chibi Moon: Progress”