 This was a very emotional project for me for many reasons. I cried (both anger and joy) several times throughout this crafting process. Before I get to the actual progress write-up, I’ve got a lot to say about this costume!
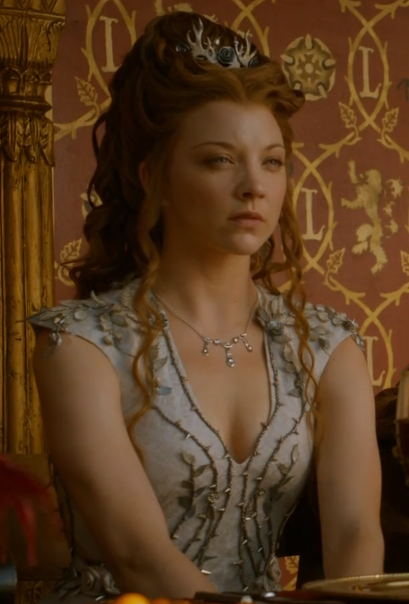
This project began as a costume initially meant to mimic her wedding dress using practical (aka inexpensive) techniques. As with any costume I make, I wanted to be accurate within reason, but be clever to save money. So basically, just a very pretty and kind of crazy but not too insane costume. But as I studied hi-res images and read detailed descriptions from the creators, it slowly turned into an attempt at a screen accurate replica and (very expensive) monster of a project. Check out the official images and description of the real dress on Michele Carragher’s site!
Its probably because I rarely do Hollywood costumes and am used to using educated guesses for materials. For anime, video games, etc. you can use many different types of materials, construction techniques, etc. and make good arguments for your choices. But with real costumes that already exist in the physical world, the materials are already decided for you. Its a matter of making the decision to use the real ones or find something similar. “Similar” is what I was originally going for. I was not able to make EVERYTHING exactly accurate, because despite my efforts, it was not possible to obtain everything, my skills/knowledge in certain areas are only so much, and time/money don’t always cooperate. However the more focused I got with quality and accuracy, the more it affected other elements.
So needless to say, this project took a very long time to complete, and way longer than it should have. Much of the “wasted” time was making various pieces only to re-do it for the “proper” versions. Another huge time waster was my gargantuan fabric hunt extravaganza fail. If I had found the right fabric right away (or made the realization in the beginning that the fabric doesn’t exist because its actually custom woven by the GOT people!) I would’ve finished at least a month earlier.
It was also very very expensive, and I’m embarrassed to admit how much I spent on everything (and I won’t here). When you buy materials throughout a 3 month time period and insist on using the same materials the costume designers did (or high quality replacements), it really adds up without you noticing. I emailed Michele Carragher a week after the purple wedding episode aired and asked what everything was. At the time I had no good pictures and had no clue what anything was. She responded right away (Which I am SUPER grateful for!). So part of me thought, she told me what these things are, how can I NOT buy those exact things??
Despite all the crazy setbacks I had, I loved working on this project. My hands were dead for awhile (95% of this dress was hand sewn!) but it was so nice to just be able to sit in front of the tv and attach all the whosits and whatsits. I love embroidery and beading and super tedious stuff, and I was way excited and motivated for it all. I feel like most people look at this dress, see the all the intricate stuff, and think “Oh gawd kill me now.” Not me! :P
Now on to the crafting part!
I’ll start from the base and move on to the details.
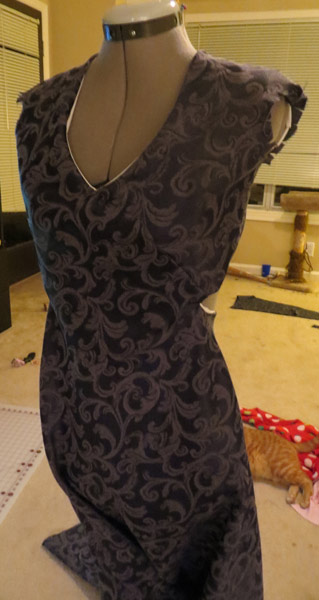
Mockup:
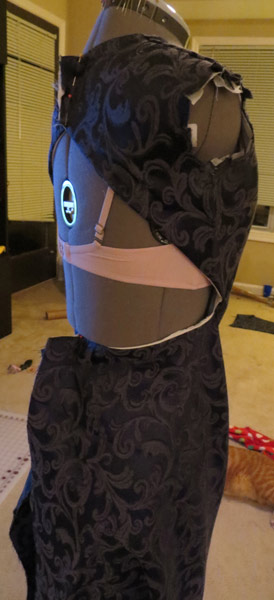
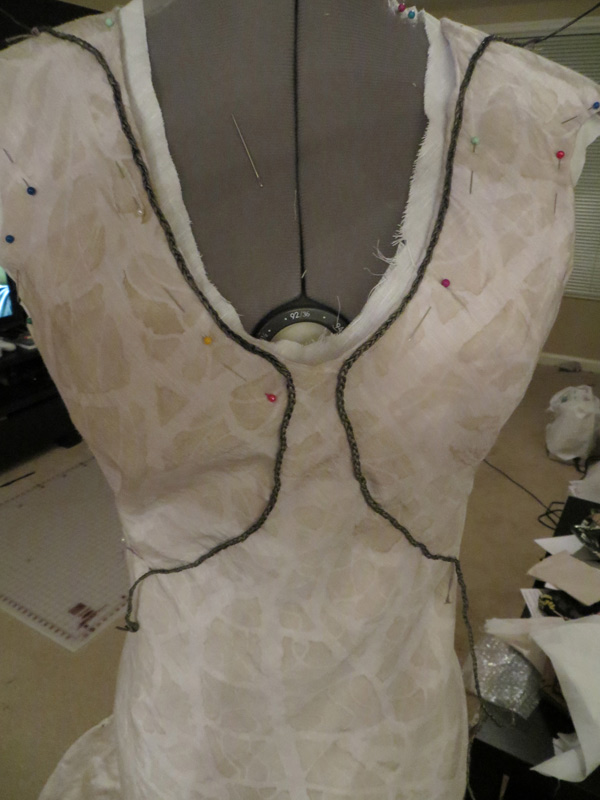
 I studied the high res images to get an idea of how they constructed the main dress. It’s a very interesting puzzle to say the least. The only seams I could see were on the shoulders, sides, and back closures. Michele Clapton had mentioned in some of her descriptions that it was on the bias, so that’s how I figured it out.
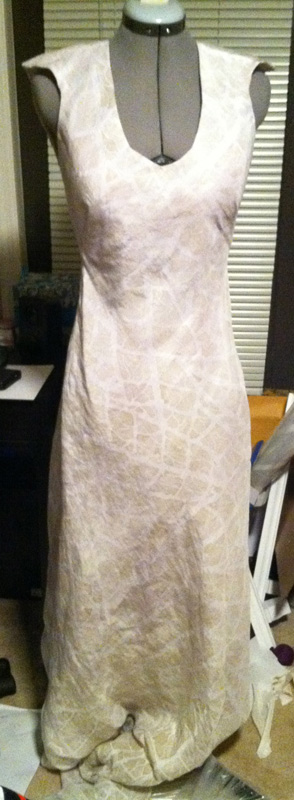
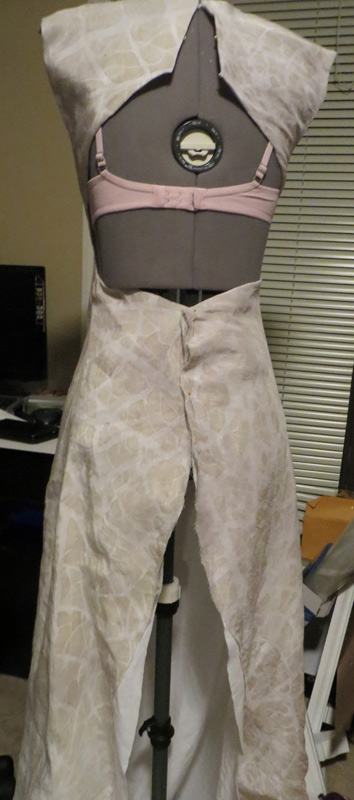
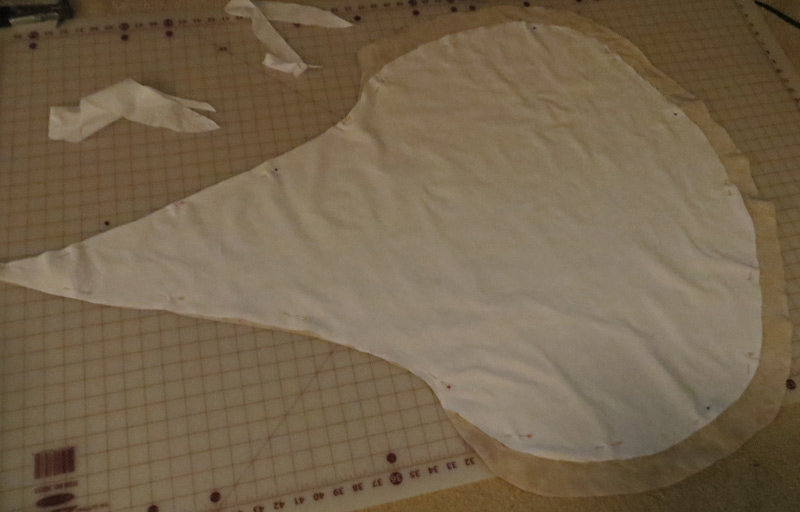
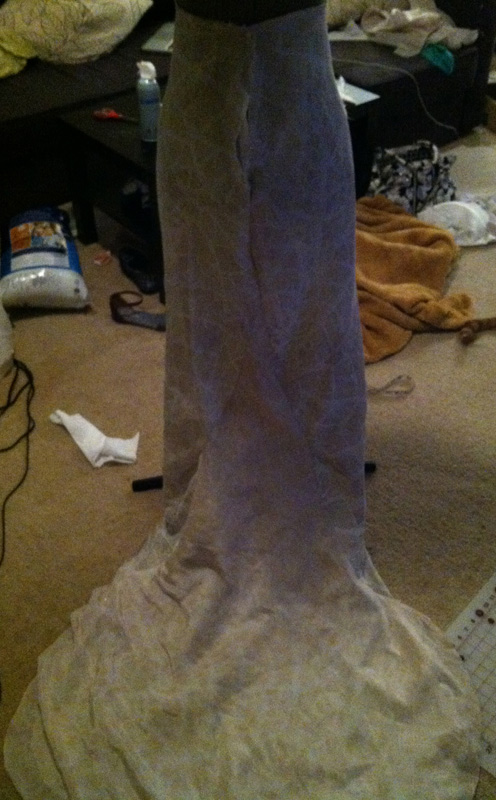
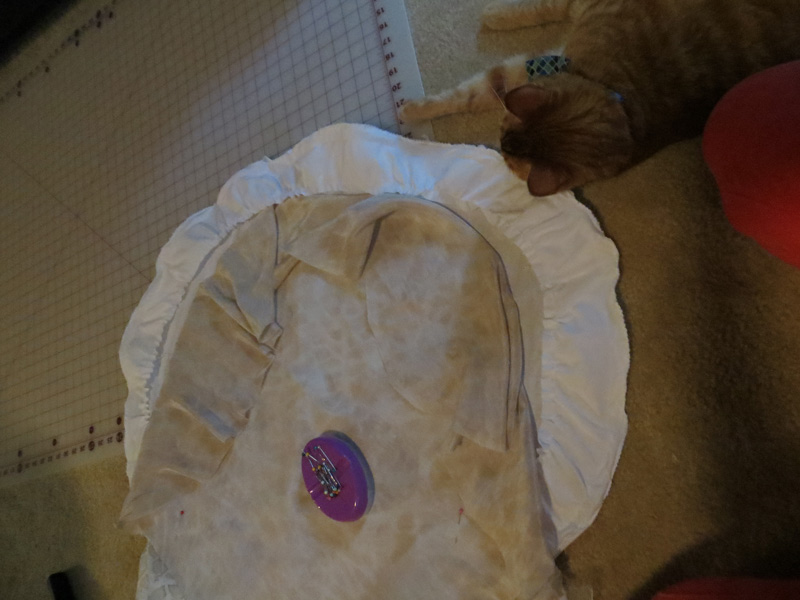
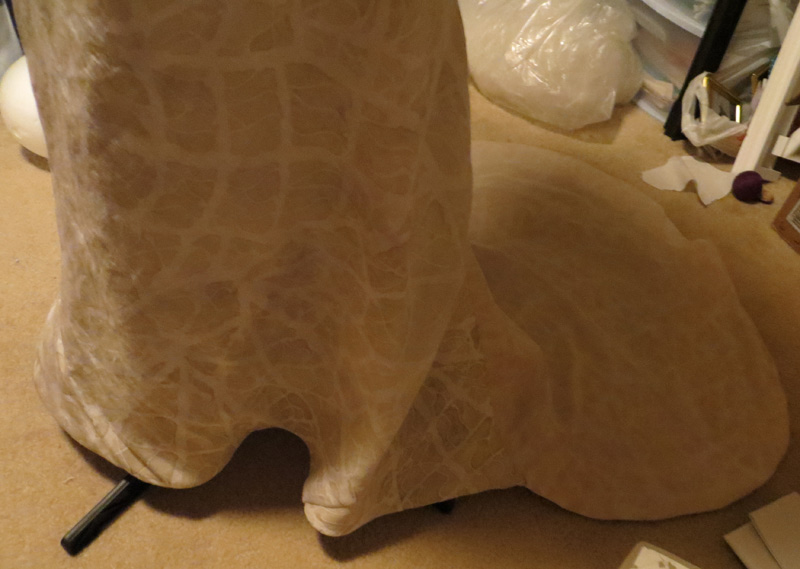
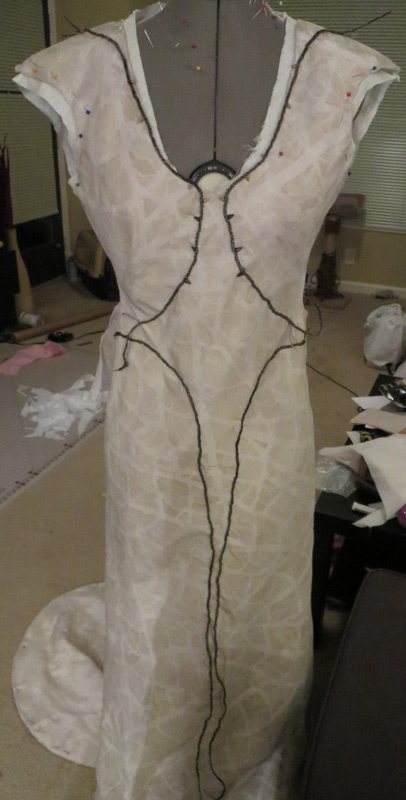
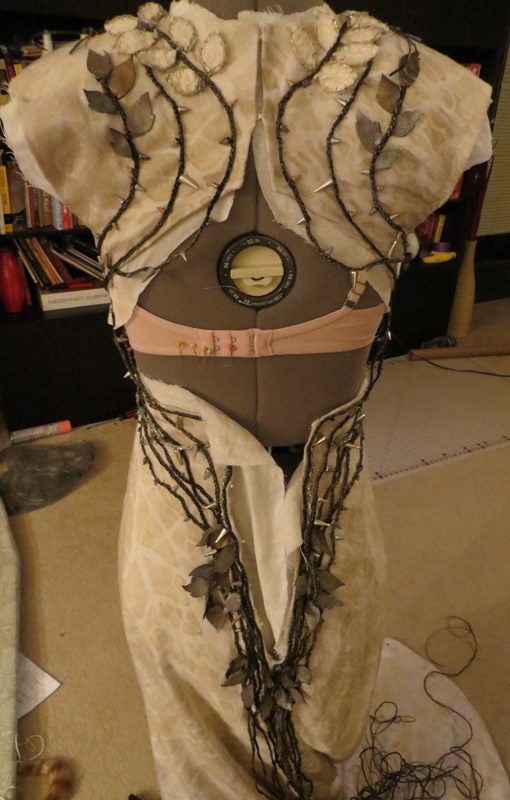
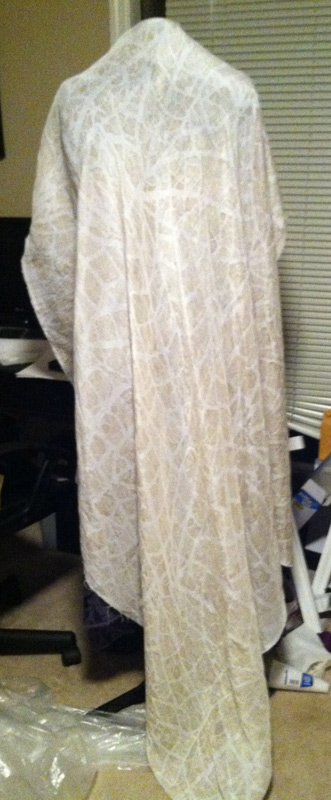
First I just draped the basic shape on my dress form with scrap fabric. Then I folded my real mock fabric (a leftover upholstery fabric) on the bias (diagonal) and used that as my center. This way I was able to have the entire dress as once piece, except for the small upper back pieces and train insert. It was super tricky to get the fit right with the odd cutouts, but I finagled it somehow by adjusting the seams here and there. One issue was that it HAD to have darts somewhere around the chest. I couldn’t see any in the source (I mean, what sorcery is that???) so I added them in a way that I could cover them later with vines.
Fabric:
As mentioned before, the fabric saga was a huge nightmare. I scoured the internet, went to every Atlanta fabric store I could find, and also the entire LA fashion district that I got lucky enough to visit this summer. Miles and miles of walking through stores! Sure I found fabric that was “close” but really everything was only “kind of close” and nothing was “really close.” That leaf pattern is very specific, and the more I looked at it, the more I wanted it to be right. Also a huge factor was fiber content. They used a silk linen mix, so of course I wanted this, but was willing to negotiate with natural fibers for the proper print.
Anyway after all that effort, I read somewhere that they weave their own fabric in house, and this was one of those. I came so close to giving up and going with something “kind of close,” but why give up after all that effort? A not great fabric would defeat all the crazy effort I put into this so far.
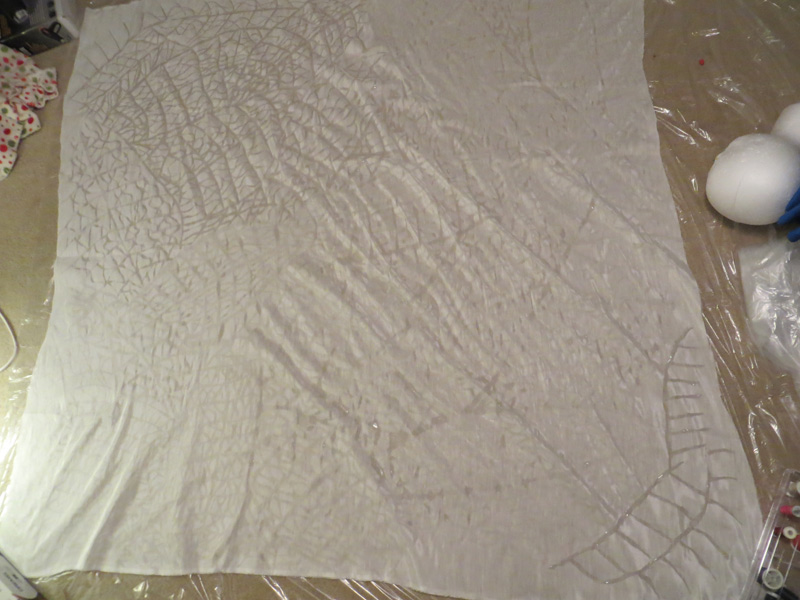
 So at some point I got the idea of making the fabric myself. I actually looked into weaving, but that was way out of the question 2 months out from the con. My next idea was painting. So the next part of my fabric search was finding a plain base fabric with the right fiber content. After scouring, I took a gamble on an ivory silk/linen/hemp mix that looked nice online (no samples). When it came in the mail and I saw how beautiful and perfect it was, I actually cried. My hunt was over!
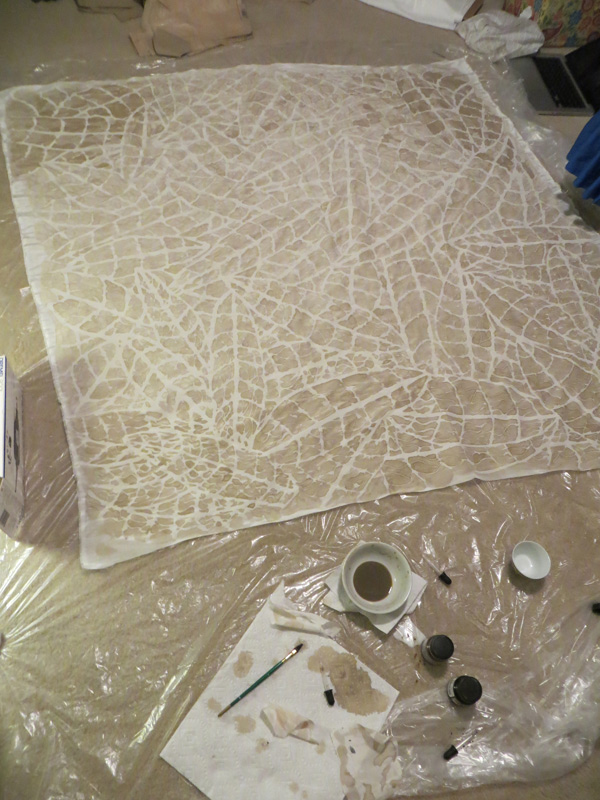
 Now for paint. I initially tried regular Jaquard fabric paints because I’d successfully used them before. But it just looked awful on the silk, like kid’s paint. Then I thought, this is (mostly) silk, why not silk paint? So I watched some tutorials and picked up the materials. I used resist (a gooey white paste) to draw all of the leaf lines, meaning the silk paint wouldn’t dye those lines. This took many many hours. Then I went in and dabbed the dye in between (many many more hours). When I washed it and took it out of the machine, I cried again because it was so beautiful. Later however I realized the color was way too peach, and the lines were pretty obscured, making the leaves hard to see. Thankfully I ordered double fabric than what I needed. So I bought Jaquard Neopaque paints (very watery compared to their other paints) this time to get a more accurate color by heat setting it (instead of the dyeset wash the silk paints needed, which I believed caused the fuzzy lines). Well… This method worked way too well and the lines were way too sharp, plus the color was too dark. It looked like jungle fabric! More crying, the bad kind this time.
But after almost giving up, I ran it through RIT dye remover, which I knew wouldn’t completely remove the heat set paint, but kind of lighten it, which it thankfully did. I also ran it through a very light silvery dye rinse to make the lines less noticeable. This did the trick for the most part. I finally forced myself to stop the madness, and chose that as my fabric. Honestly its still not quite right, and if I had a third try I’d know how to make it better, but time and fabric were running out and I needed to move on.
Dress Construction:
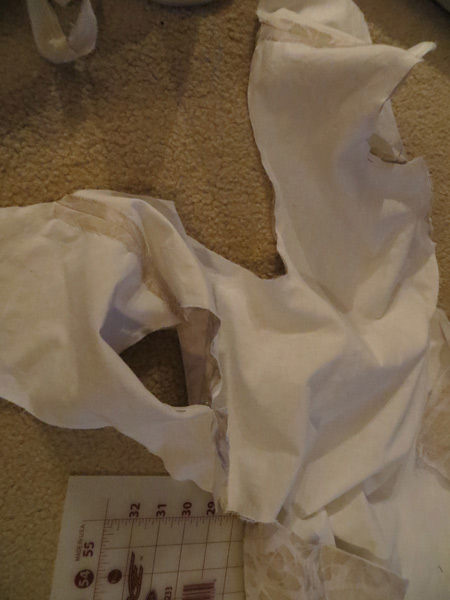
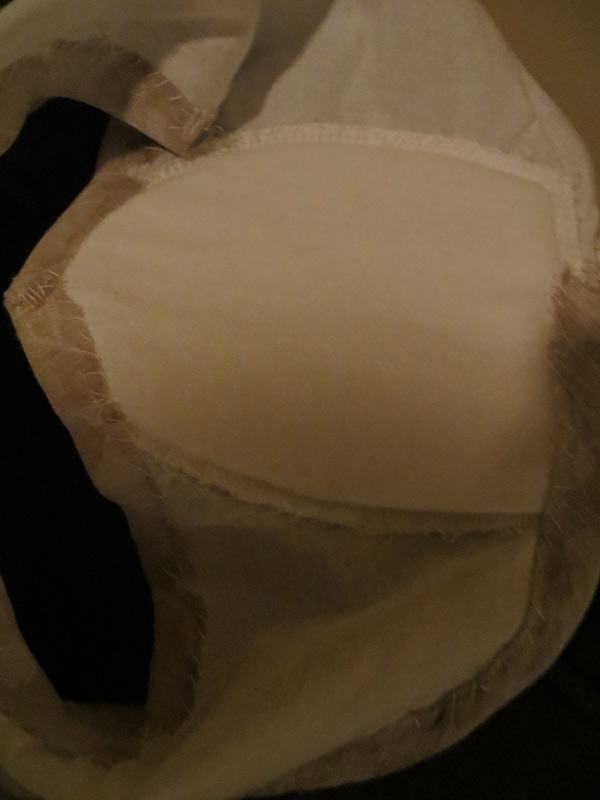
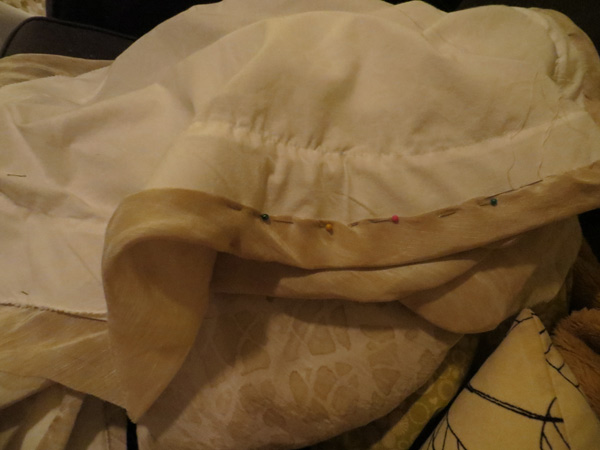
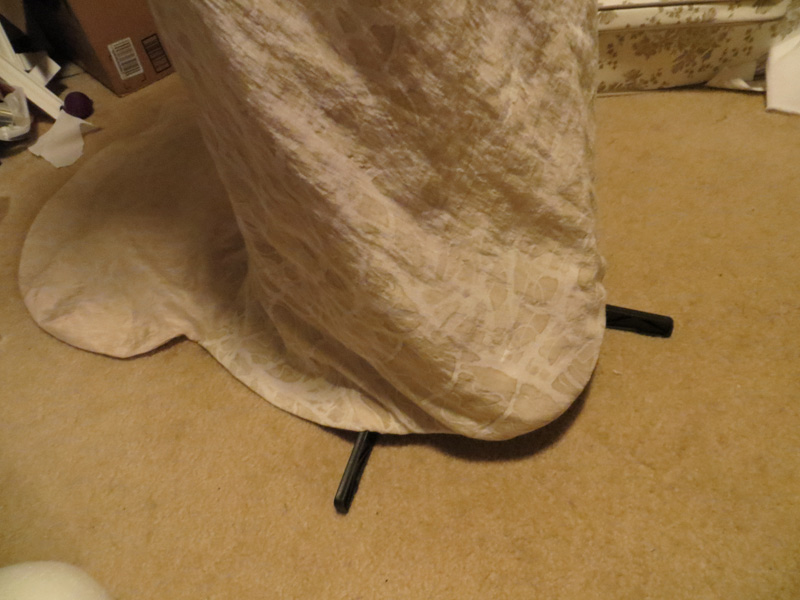
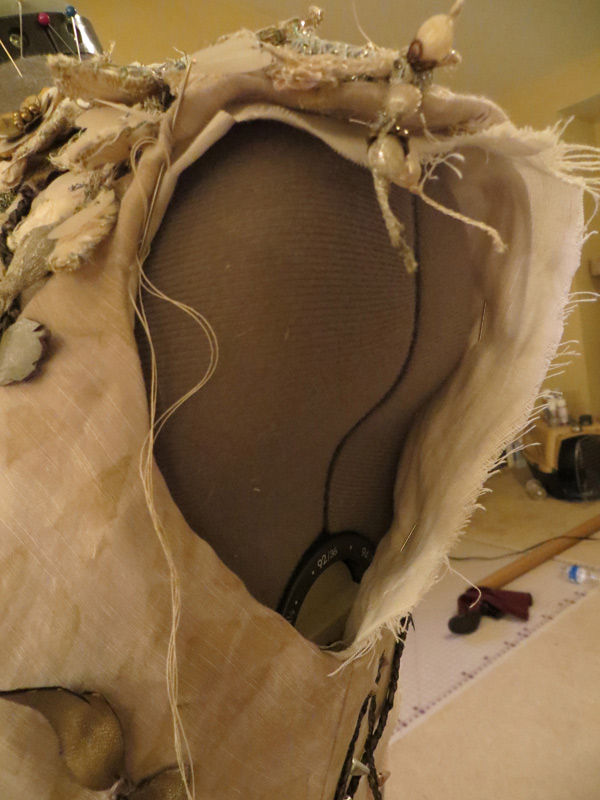
Using the pattern I’d already figured out, I cut out what I needed from the silk and some muslin for flatlining. I hand sewed these layers together to keep them stable. I sewed up the main seams (shoulder, side, train) with a machine, pressed the seam allowances flat, and hand sewed them down with silk thread (gotta be fancy!). I made shoulder pads out of fleece and muslin to make the shoulders stick out and look stiff like hers. I stabilized the bottom of the dress and the train with 3″ horsehair braid. I also made a separate copy of the dress out of linen to be my lining layer. This I left to the side to attach last. The fashion layer is what I sewed everything onto. There is a closure at the top back, and the bottom back. Both close completely with hook and eyes I sewed in, with a modesty panel on the bottom one.
Detail Prep:
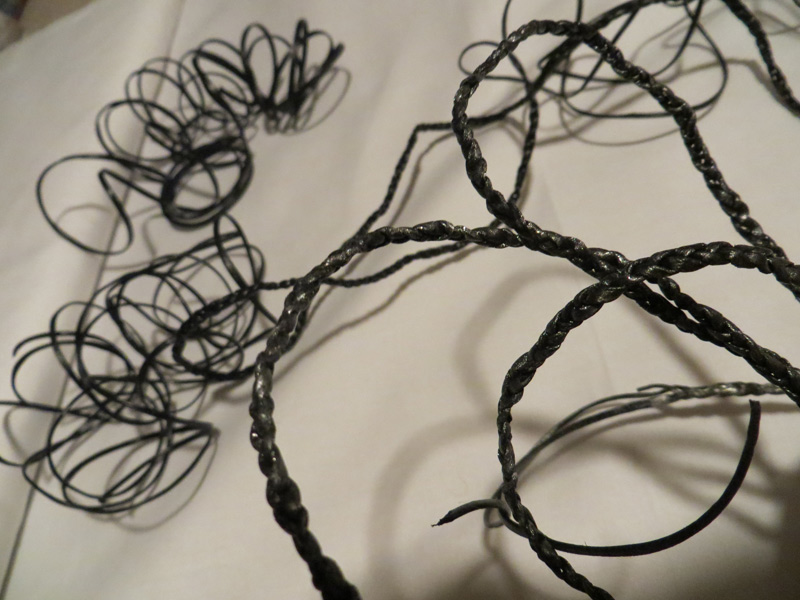
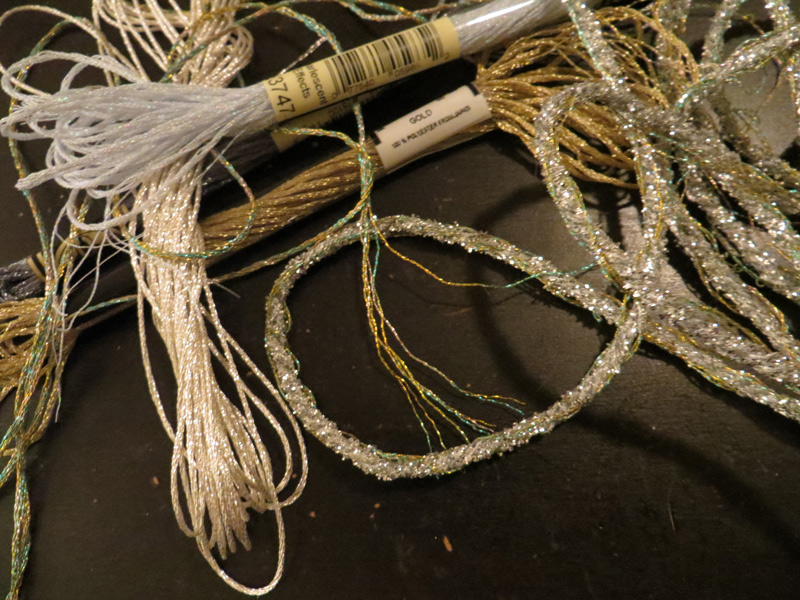
I started by making the cording. I got black leather cording and split it down the middle since it was too wide. I braided all of that in sections and then painted it a silvery gold. I think I used about 70 yards of cording. I actually carried the cording around in a bag for awhile so I could work on it outside the home. (For example when I got a flat tire and had to wait forever for AAA :P)
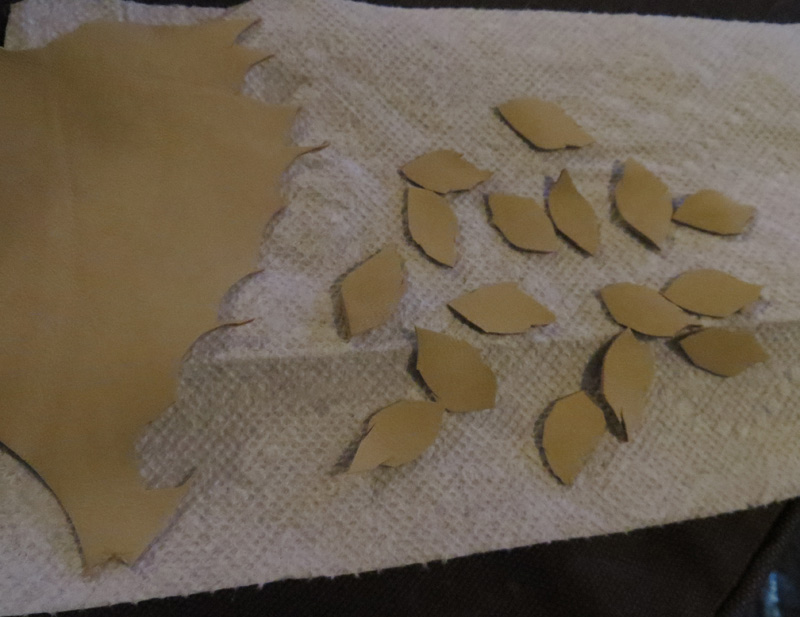
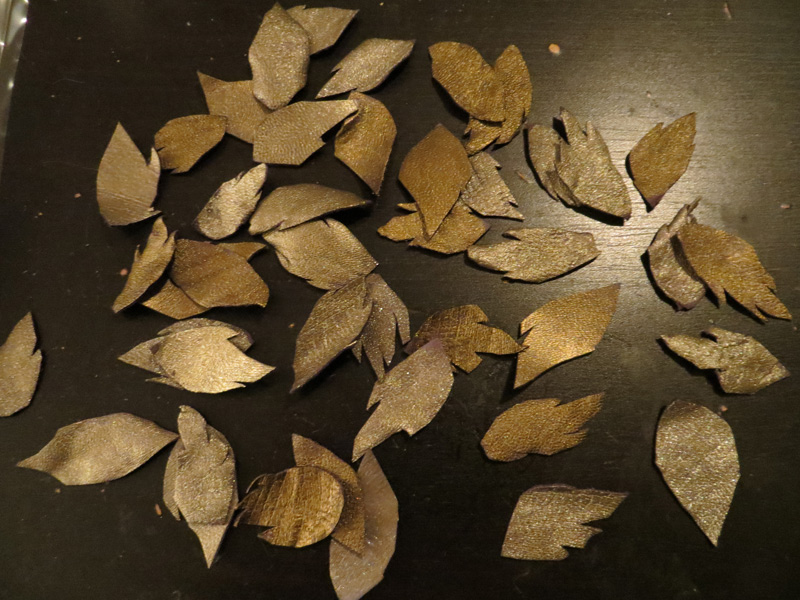
I also cut hundreds of leaves out of lambskin. Since the lambskin I used was very light, I dyed them with black RIT dye. Then I painted one side of each various silver and gold tones. I painted them after I cut them so the edges would be nice. For some reason I thought the real version’s leaves were only painted on one side, but looking at it later I think I was wrong, oops. Toward the end when I ran out I ended up painting both sides of scraps and then cutting the leaves out, much faster that way.
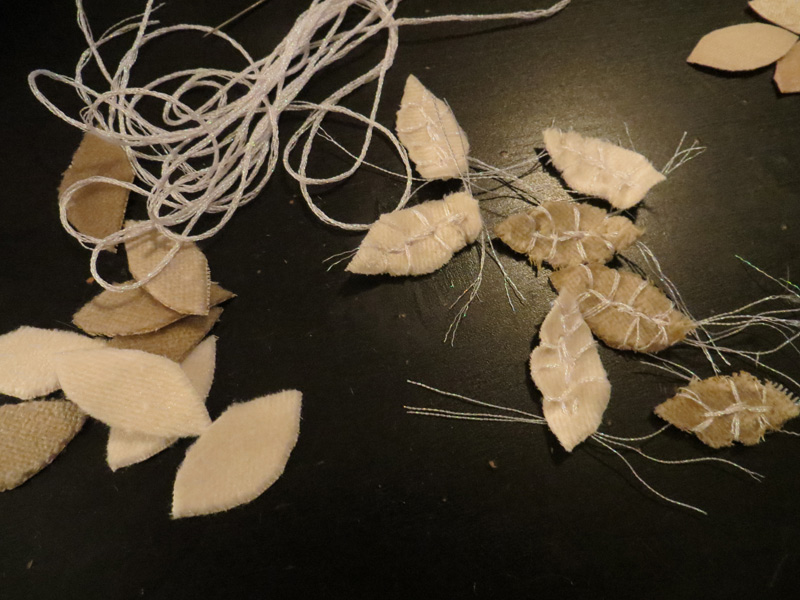
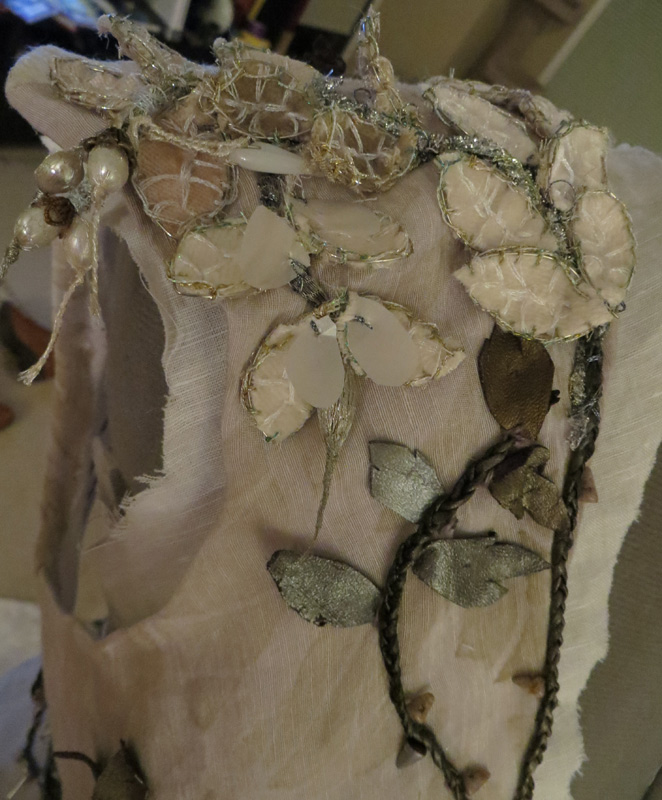
 For the fancy embroidered leaves, I actually made them out of thicker pearl colored leather first. Then I saw in a description that they were velvet, so of course I had to remake them all. So I cut the leaves out of various ivory and beige velvet shades. First I individually embroidered the leaf lines in each one with iridescent white embroidery thread that I thinned down. Then I cut out matching pieces of champagne silk organza as backing, held thin craft wire around the edges of the leaf, then embroidered it all together. For embroidery thread I bought various silver/gold/iridescent colors, pulled the tiny threads apart, and combined them into my own special thread mix (now you are starting to see how crazy this project really was for me!) I tied off and left the embroidery ends about 2 inches so I could use that to sew it on later. I made around 80 of these.
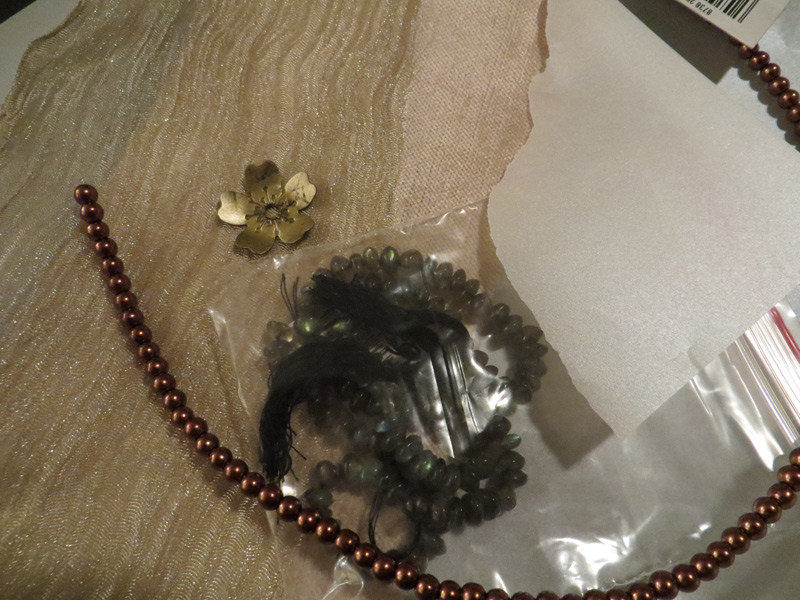
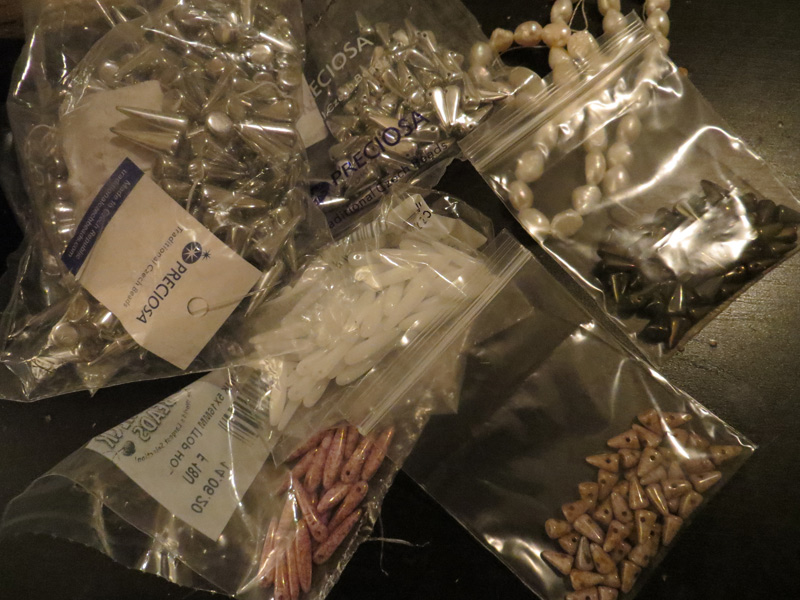
I made several versions of her little spriggy hanging beads before I finally realized what they actually were made out of. Despite spending a lot of time on them using all kinds of random pretty beads n’ things, I bought the real stuff (pearls and italian mesh) and re-made them all accurately. Kind of ironic that the accurate ones were much easier to make, just wrapped the pearls with the mesh and added little brass caps to some of them.
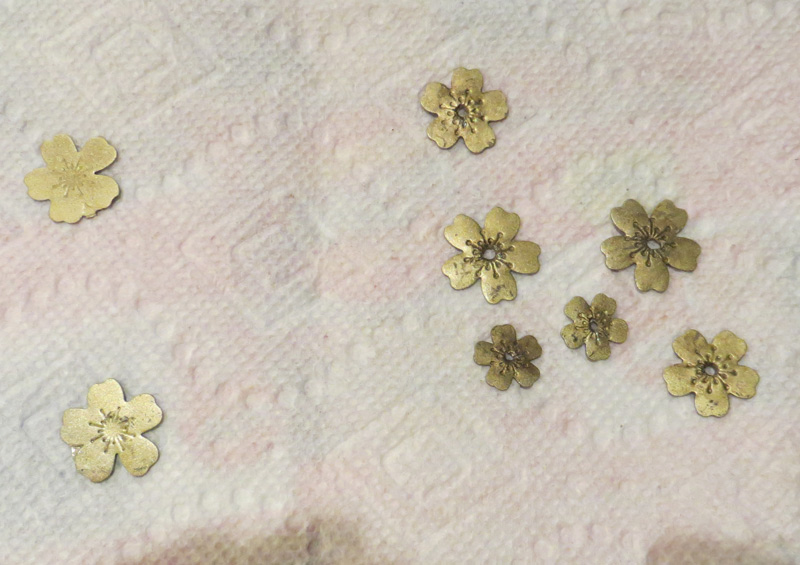
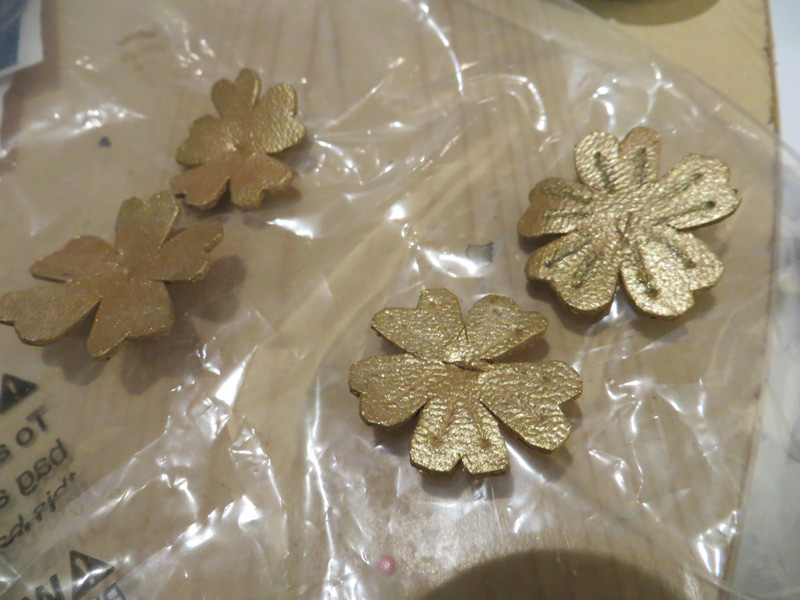
 For her small metal flowers throughout the dress, the first thing I did was buy paper roses, pull them apart, dip the layers in plastidip, then paint. Some turned out okay and would have been totally acceptable to most people. However when browsing the craft store as I so often do, I saw some very similar metal flowers and just had to buy them. I painted them gold and bent them a bit, and luckily they turned out very close to the real ones. And for the slightly larger flowers behind them, I cut them from lambskin and painted with gold leather paint. I had originally made them from craft foam but the leather just seemed nicer. I think the only “cheap” material I used was the pearl paper for the middle layer of the flowers, and the little scales on some of the shoulder leaves.
The spikes are czech glass, which I had never heard of before this. I could have bought any metal spikes I suppose, but nope, knowing the real ones are czech glass, that had to be it. They aren’t ridiculously expensive, but not super cheap considering I had to buy a ton of them (around 400).
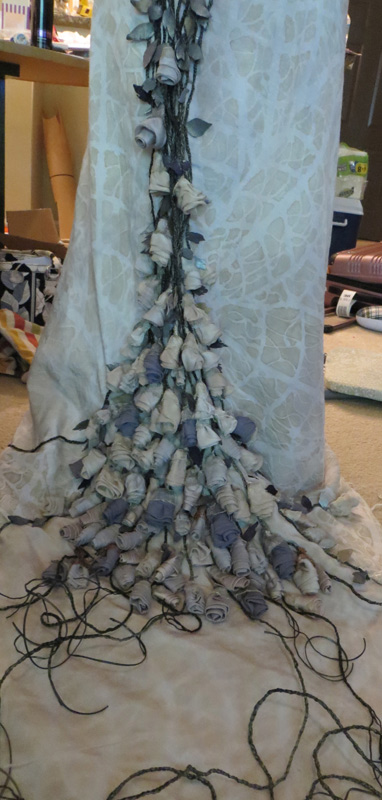
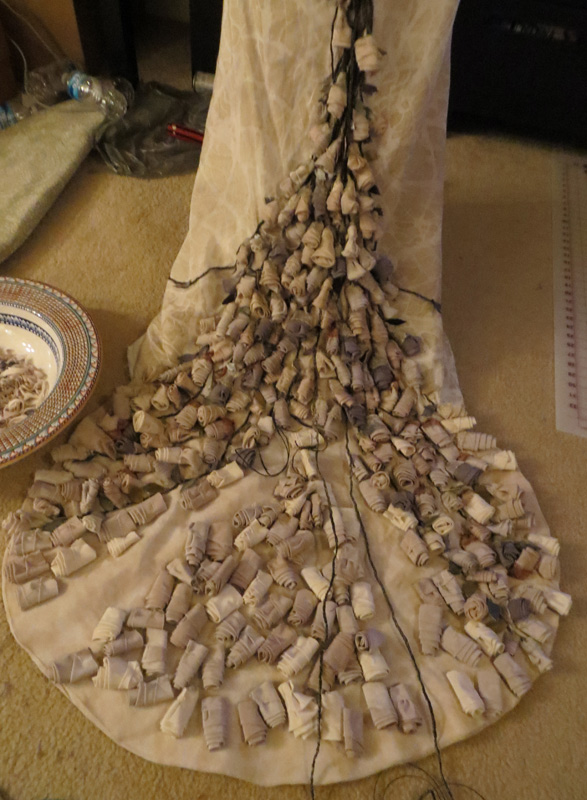
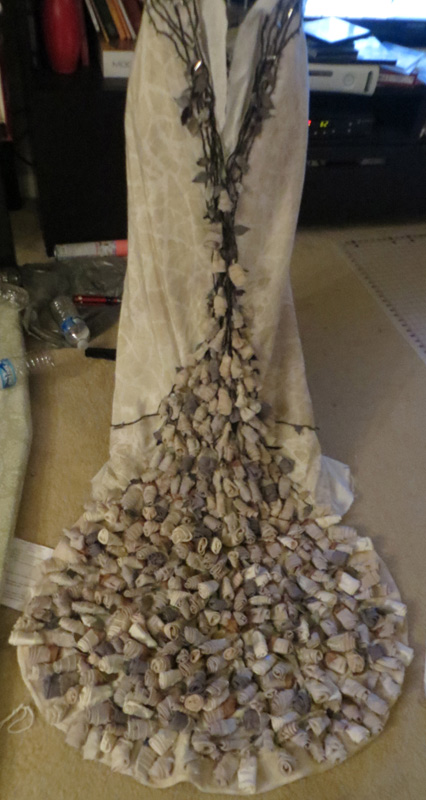
 The roses were quite a doozy to make. For some reason I though they would go fast, but nope. I started out with strips cut from the bias from the main dress fabric scraps. I underestimated how much fabric those roses needed, so I ran out and desperate scrambled for every silk and linen scrap I had in my fabric stash. I dyed them slightly different beige-ish colors for visual interest, plus the dark ones sprinkled in. I made 350 of them (because Michele said somewhere that’s how many they made), I think I used 8 yds of fabric. Because of this the train is very heavy! I used italian mesh to wrap the rose ends. At first I had no idea what that stuff was and was coming up with all kinds of bizarre materials. Then I took a close up pic to a bead store and they told me what it was. Once I knew what it was, I HAD to buy it. And this stuff is not cheap at all. I got lucky and got half of it for not an insane price from an etsy seller, and shelled out a bit more for the other half from a bead site. I did order several shades, that was fun at least. However I didn’t order quite enough so I ended up supplementing with regular craft wire mesh. I think it looks pretty with the real stuff, but it tore my fingers up. :(
Detail Attachment:
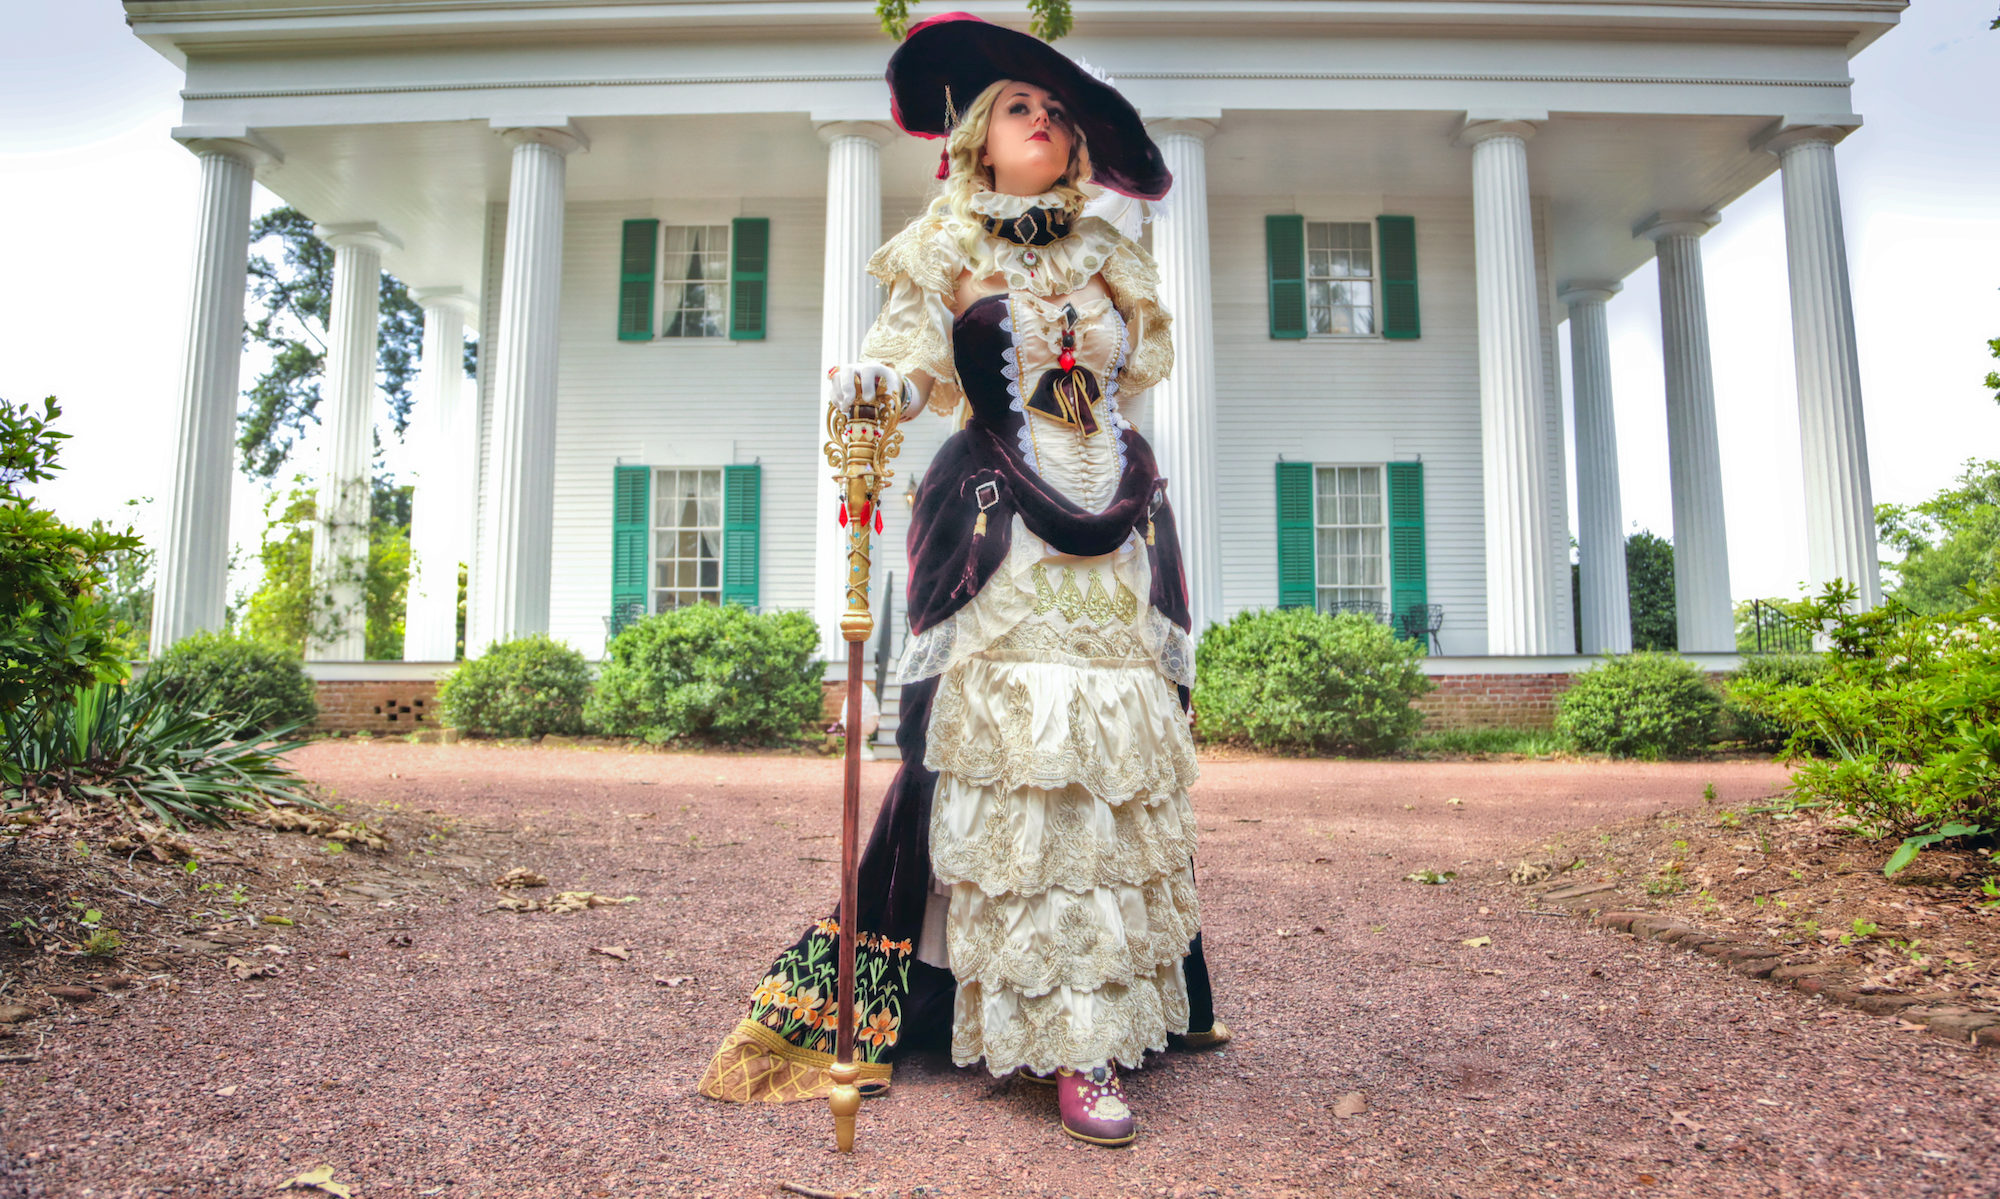
This is the part where the dress finally gets to come together and look awesome.
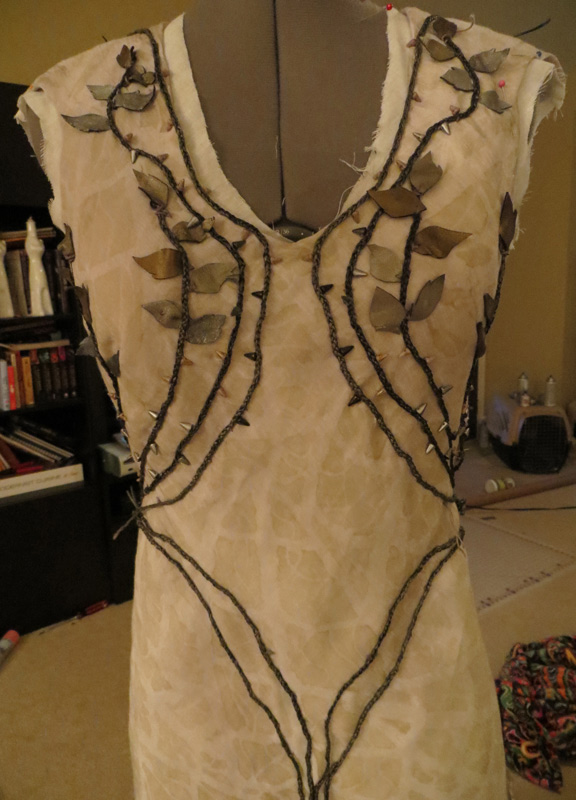
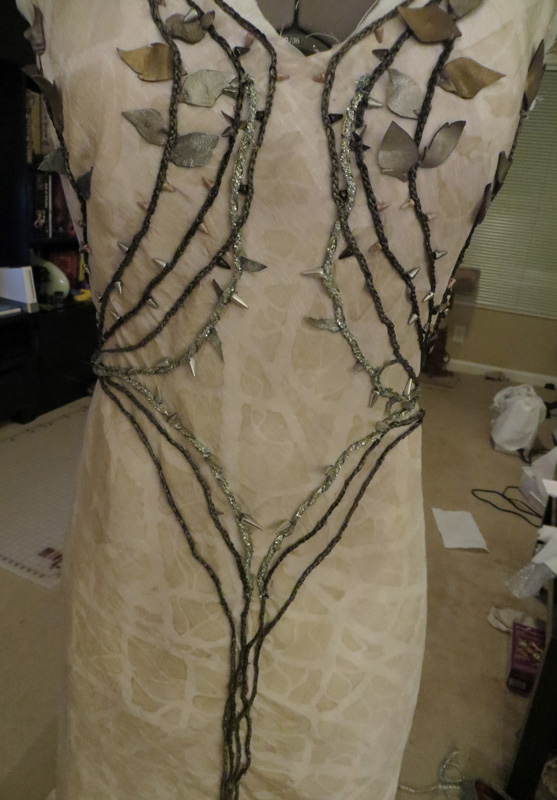
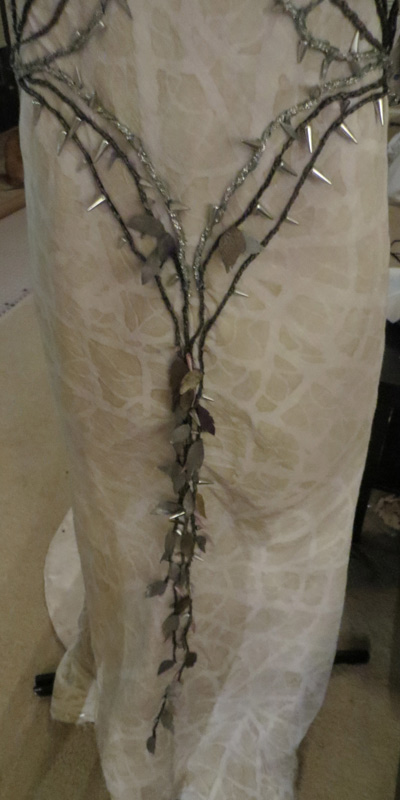
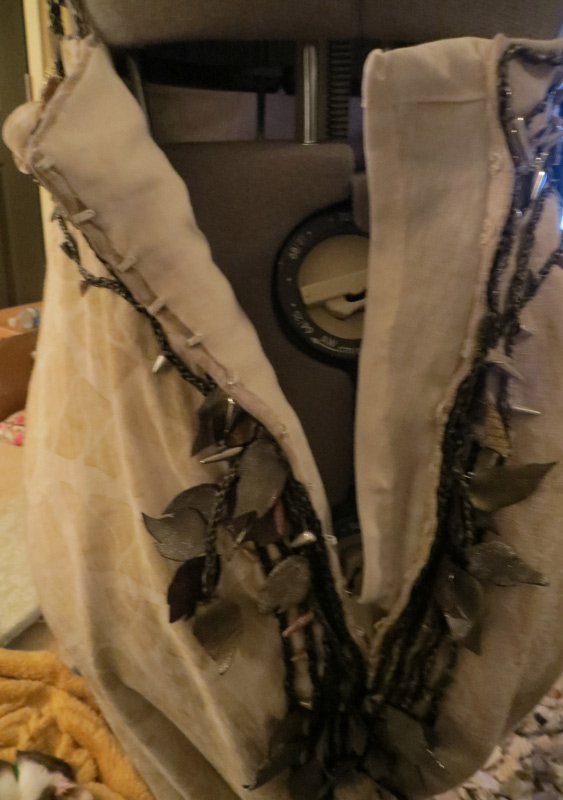
 I started by making a diagram of her vines and their exact placement. I used hemp thread (that I dyed dark purpleish) to carefully sew each leather cord on. I also sewed in the leather leaves in this step. Then after that I went back over and added the spikes with invisible thread. Some of the vines are weird gimp silvery stuff instead of leather, so I sewed those on with the fancy embroidery thread.
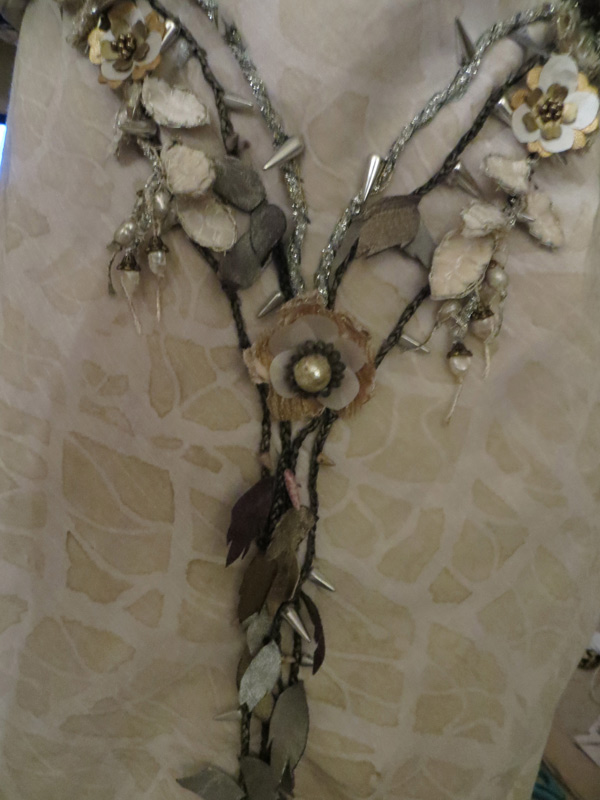
I added the velvet leaves and sprigs with leftover embroidery thread, mounted onto some of that silvery gimp cording. The flowers are sewn on with the layers sandwiched. In the middle I individually sewed about 8-10 tiny Swarovski pearls. The center front flower has a center that is a pearl wrapped in italian mesh, then around that are real labradorite beads (what they used of course). There is a back flower layer made from velvet the same way as the fancy embroidered leaves.
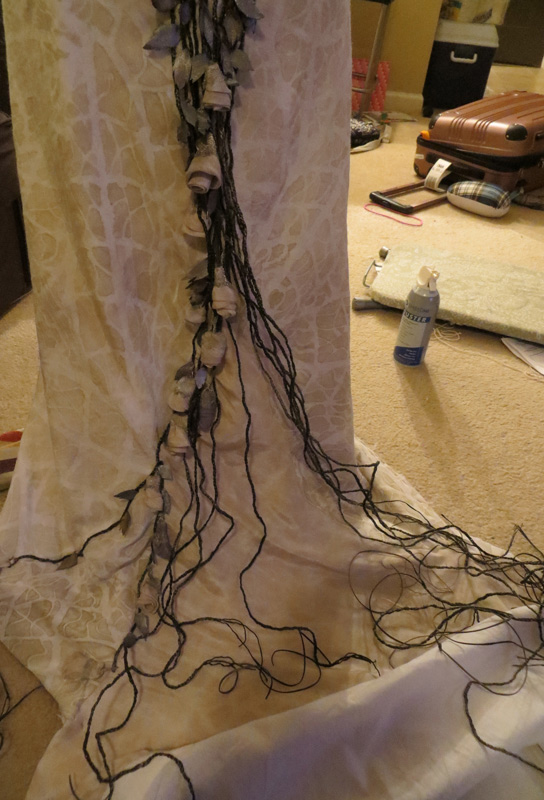
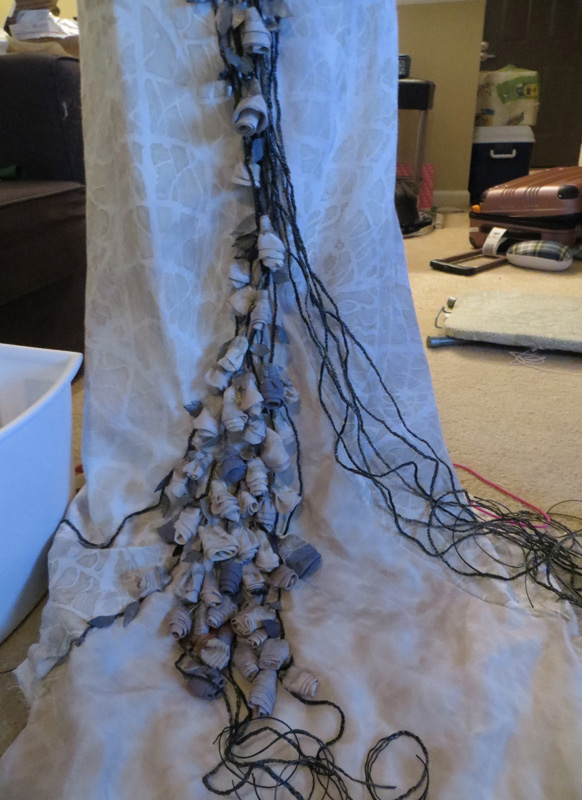
I sewed each rose onto the train with hemp thread. Half of them are sewn along the cording running down, and the other half are laid in the cording gaps. This took a really really long time! But once I finished adding the roses, I hand sewed in the linen lining I made before. The dress was finally done!
Crown:
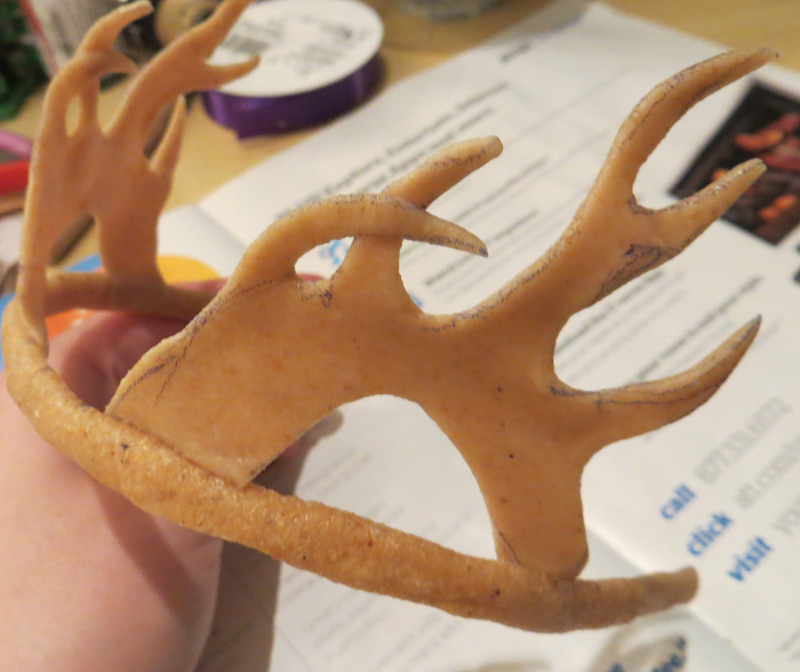
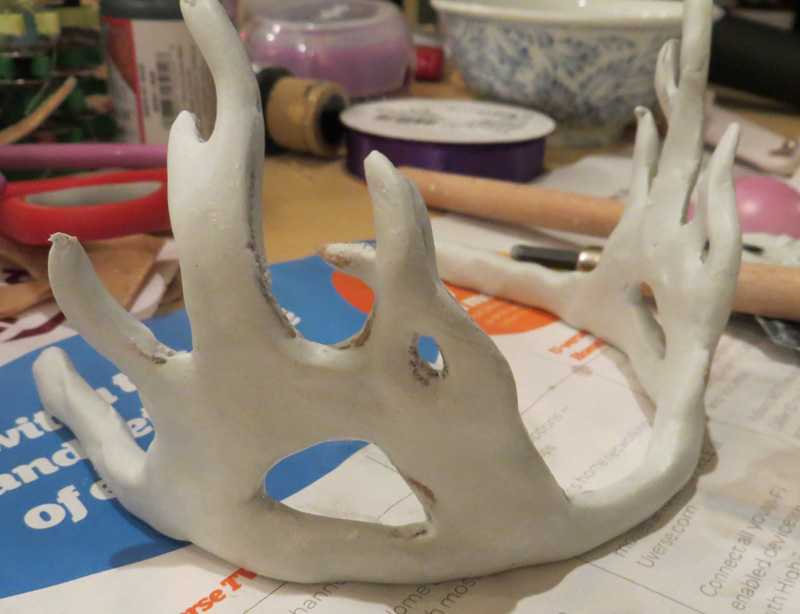
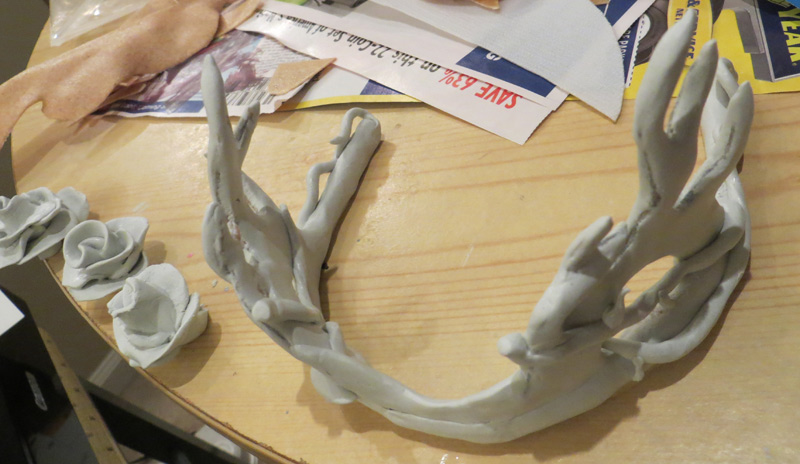
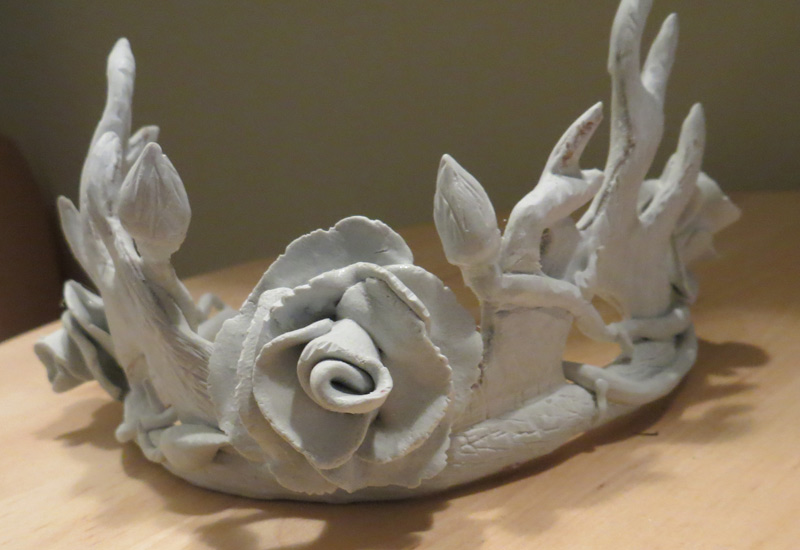
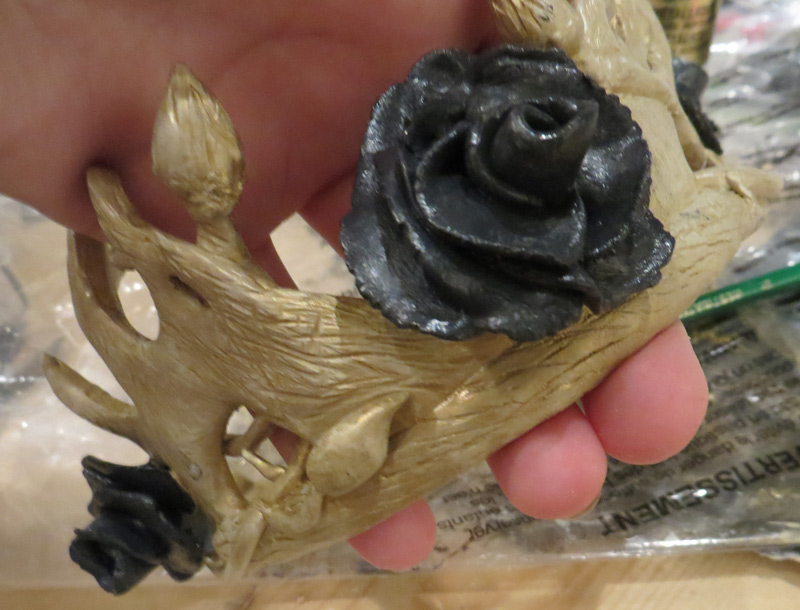
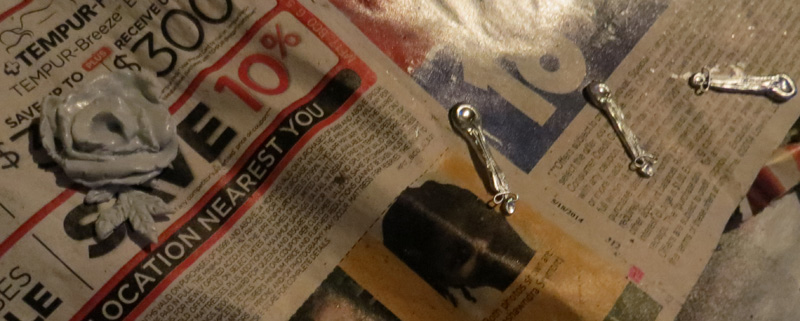
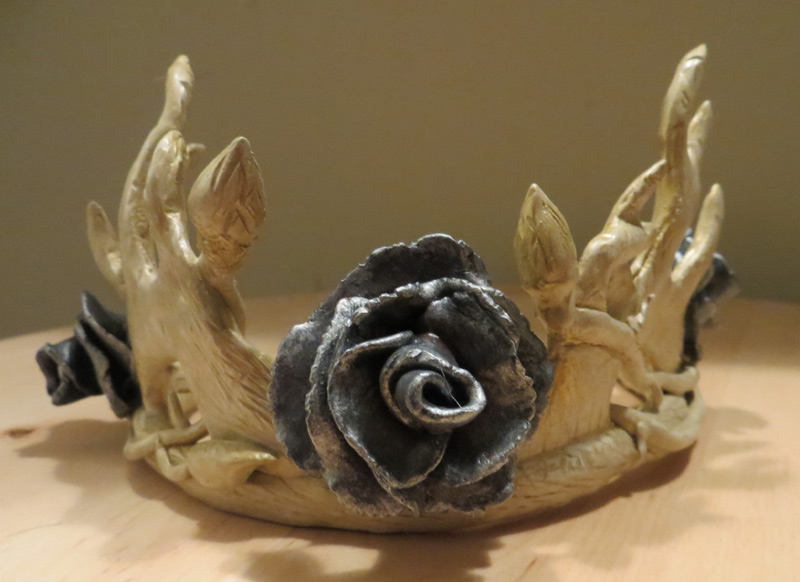 I made the crown by creating the basic shape with Worbla, then covered it in Apoxie Sculpt. I got it fairly smoothed out and made the roses and buds separately. I let that cure and did the wood detailing with a dremel. I epoxied the roses and buds on, then primed and painted! I finished with several coats of resin to make it stronger.
Jewelry:
I made the necklace pendants with Apoxie Sculpt and Swarovski crystals. The ring is a rose magnet I painted, added little Apoxie Sculpt leaves to, and glued to a pre-made ring base.
Wig:
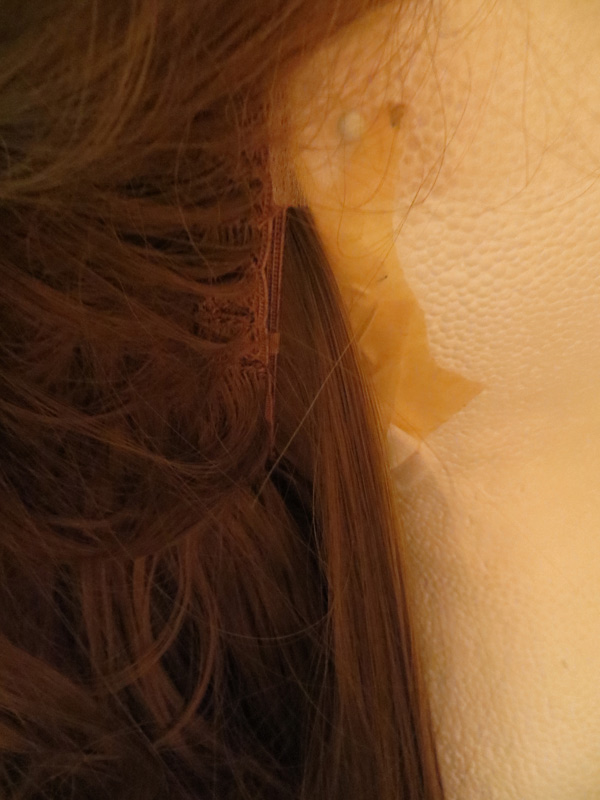
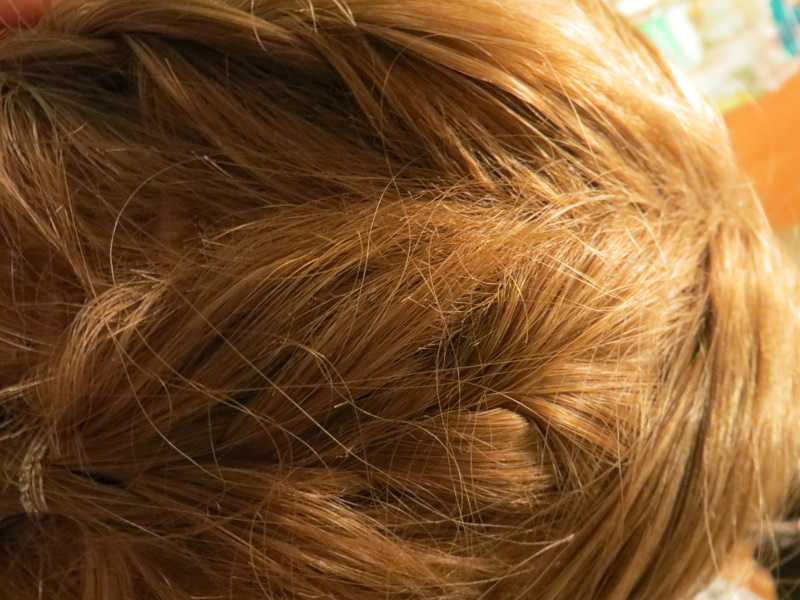
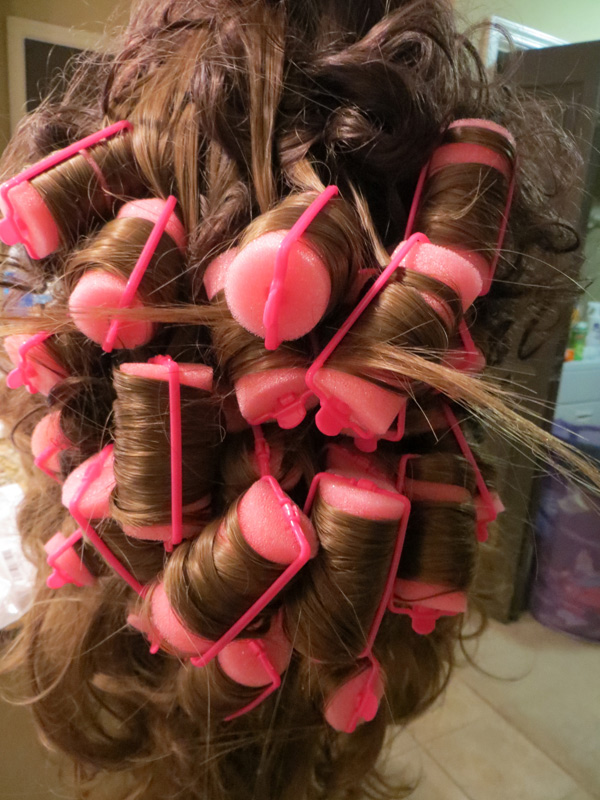
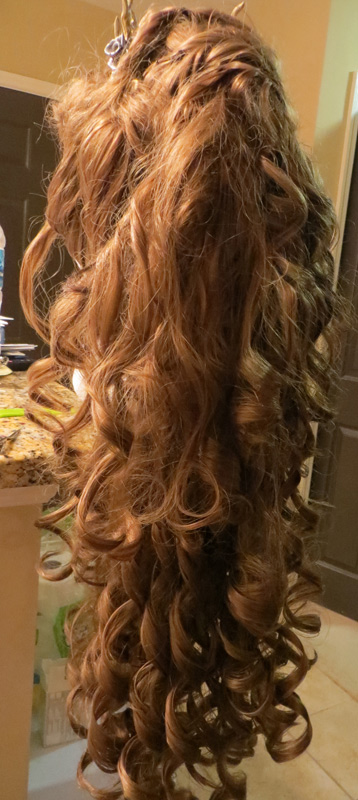
The wig base is a light brown Matilda from Arda Wigs that I sewed matching wefts under the sides to look nice since they are pulled up. I got a dark brown curly clip and sewed the rest of my light brown wefts into it. I braided the center top of the wig, then dug the clip into the wig. I scrunched up a light brown hair bow (they were on clearance!) and pinned that at the base of the clip. This served as the hump for the rest of the hair to pin into. From there it was just twisting up chunks and pinning them. After everything was pinned up I added all of the curlers, blasted with heat and hairspray, and took them out.
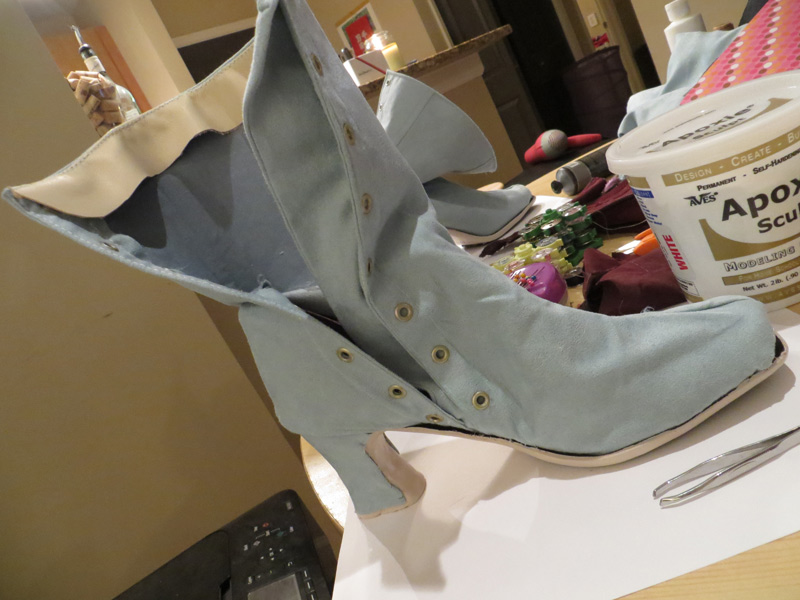
Shoes:
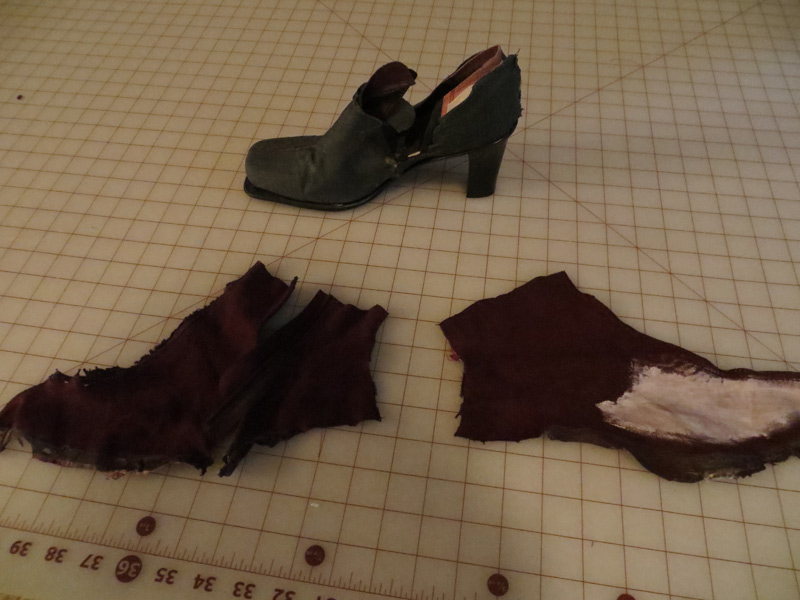
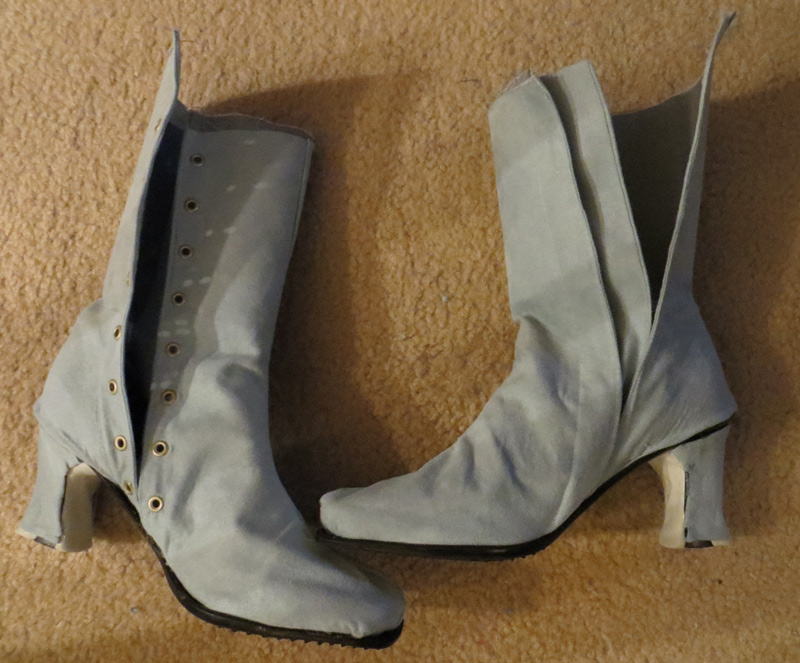
I made custom shoes for this, but ended up not wearing them because I wasn’t happy with how they turned out. I bought boots with a similar shape and heel and ripped them apart. I used the old ones as a pattern to make new ones out of light blue suede. I also modified the heel with Apoxie Sculpt. I added the grommets and lacing. They turned out ok and look kind of nice in pics, but the blue looks horrid with the dress. Not sure how because it looks like I matched the color right, but yeah they look bad. So in all of my pictures I’m wearing my ivory Tavistocks from American Duchess.
Phew I think thats everything! Enjoy the progress pics below, and here is a link to the finished gallery!