
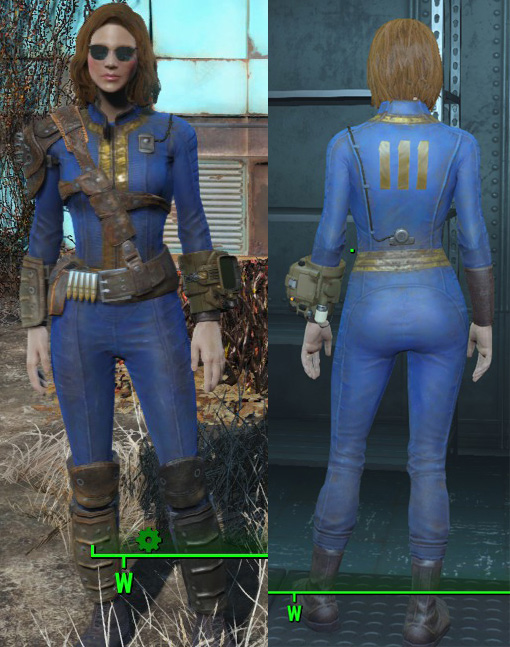
 Ever since I played Fallout 4 when it first came out, I knew I’d be making that new vaultsuit. Its so much more interesting than the previous ones. I hunted ’round the internet for the right fabric and studied it for months and months before finally deciding to make it. I also decided to do some leather armor since I needed an excuse to learn leatherworking. This post will cover the vaultsuit and armor, and the next will cover the props.
Vaultsuit
I looked around briefly for jumpsuit patterns but didn’t see what I wanted. I was originally planning on using stretch fabric, so I had in mind to start with a basic bodysuit and add the details. Problem is, I couldn’t find the perfect fabric. After hunting through many stores and scouring the web with all kinds of creative search terms, I did end up finding Carr Textile. They have a couple of fabrics that are really close to what I needed. One is a thick 2-way stretch diamond weave fabric that I ordered samples of. Unfortunately the diamonds are way too tiny. They do have a larger perfectly sized diamond fabric, but its not stretchy. I ended up going with correct texture over function. (To be honest, while it looks really cool and accurate, I kinda wish I’d gone with the stretchy one for a much better fit. I might do that if I ever make a second one.)
Since I chose a non-stretch fabric, I had to approach the construction totally differently. I had to be careful with the engineering of it so that it would be form fitting, but also maneuverable in. Again, there was nothing out there in pattern land that really existed. At some point I got the idea, why not just make a top and bottom and sew them together? So that’s what I did.
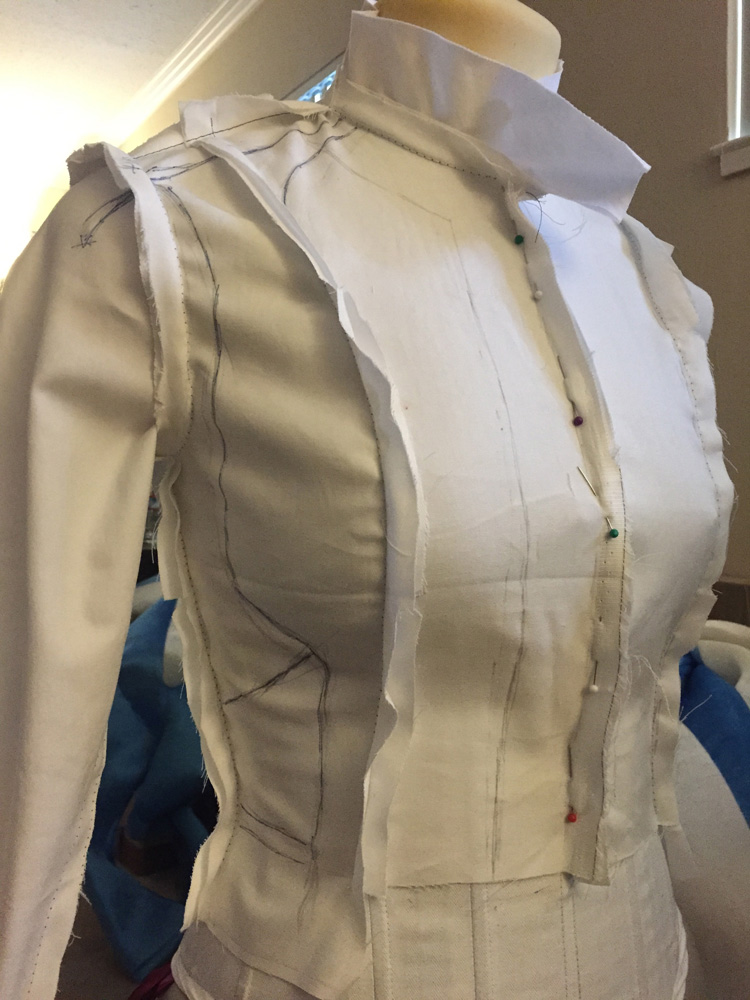 I started by using a very simple form fitting pants pattern that I had made before with non-stretch fabric and had fit me pretty well. I made a mock of out scrap cotton, then drew all of the seam lines on it. After that I cut it apart and made a pattern out of leftover wrapping paper, being careful to measure my seam allowances exactly. I did the same with the top, but started by draping a basic princess seam top on my dressform (aka no pattern) and drew the seam lines on it. I added the collar and a simple 2 part sleeve (which I’ve gotten good at drafting due to all the historical gowns I’ve done). Then I cut it all up and transferred my pattern. I ended up adding a couple extra seams than the source to get the fit nicer.
Now for the textiles. First I had to dye my fabric a bit more blue since the original was too sky blue. I had to do 2 iDye Poly baths to get it right. A note about the color: If you look at various screenshots, the color of the vaultsuit really depends on what lighting you’re in. Sometimes its super royal neon blue, and sometimes its more basic light blue. I went for something in between. After the main fabric was finished, I stained/painted some super thin leather hides to match. (I have no idea exactly what kind of leather it is, I got it on super mega sale at a random fabric store in the LA fashion district.)
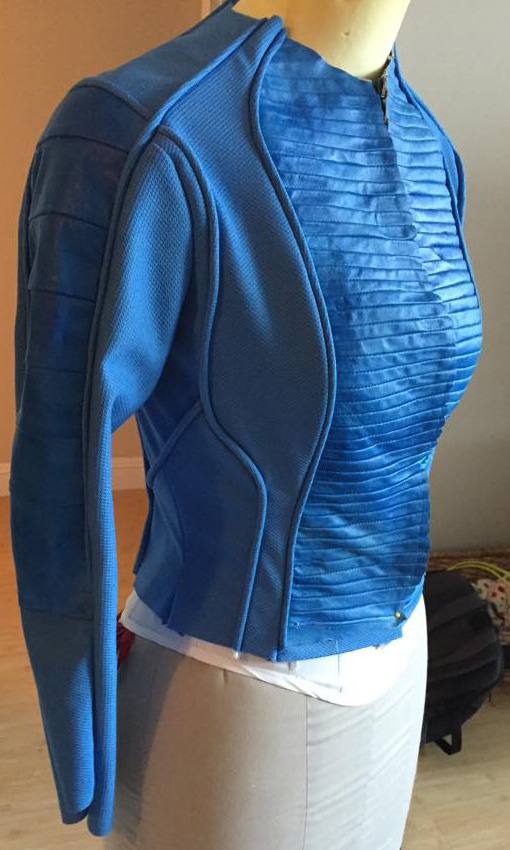 I approached the actual construction the same way as the patterning. I made what was basically a jacket, and a pair of pants separately. (I am tempted to make an actual vault suit style jacket one day, it looked pretty awesome). The whole construction process really took some planning, I had to figure out which seams to do first because there was piping in all of them, which made it super complicated. I made the piping out of the diamond fabric and cording. Due to the thickness I couldn’t even use my normal piping foot, had to use my walking foot. When it got time to do the leather parts, I pleated them first (trying to spare as much leather as possible, so they’re tiny pintucks on the inside really) then adhered them to cotton bases and cut the pattern pieces out. At some point I got all of the pieces assembled and had a cool jacket and pants. I tried them on multiple times to ensure the fit.
At this point I started running out of time (as is tradition), and I stopped taking progress photos, sorry about that! What’s not pictured is the adding of the collar and trim, zippers, and waist attachment. For the signature yellow trim, I debated for a long time on what material to use. It is obvious to me its *supposed* to be reflective material. I couldn’t find reflective fabric in the right color anywhere (at least for commercial purchasing means) so I had to fake it. Just like with the main fabric, the color of the trim really varies depending on the environment. Sometimes it looks very yellow, sometimes very old gold. Sometimes matte, sometimes shiny. I ended up going with a shiny yellow stretch vinyl. I kind of regret it though, after assembling it I wish I’d used a light gold material instead like everyone else does. But anyway, it was super difficult to apply. I had to put masking tape over it as I sewed it with a walking foot, and it still has some puckering going on. After trying to do the belt multiple times and it looking like a disaster, I ended up making a separate interfaced piece and tacking it down only at the corners. It looks way smoother this way.
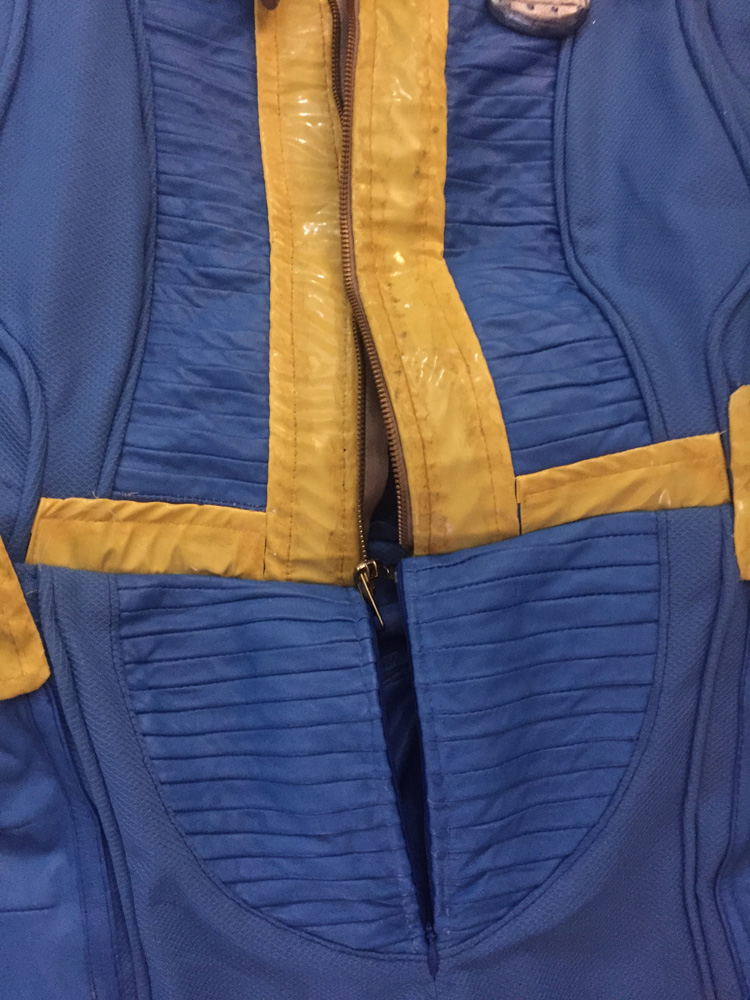 I’m kinda proud of how I did the zipper mechanism. The pants part has an invisible zipper, and the top has a separating metal zipper. This way it looks like the source, which doesn’t have the zipper going all the way down the front (which means it wouldn’t really be wearable lol). The collar is lined and trimmed with the same pleather I used for Ysolda. I used it for the cuffs as well. To finish off the vaultsuit I connected the top and bottom, then I attached the little metal pieces, sewed on real wire, and added on little foam bits to mimic the way its attached in the source. I didn’t include every metal bit due to being paranoid the leather armor would rub against it and mess it up, like the metal bits supposed to be at the waist.
Armor
Picking out the armor was really just me playing with my character, and ending up with a totally random hodge podge set. In the game there are tons of variations in the leather armor, so I wanted to capture this. This was my first real leatherworking project. It was a great project to start learning with, since the in game armor is supposed to be super beat up and imperfect. The character can either make it themselves (badly, because they are a 50s housewife/husband), or scavenge from bodies and the wasteland. The funny thing is that even though I’m a leather newb, I still had to try hard not to make it too perfect. I got a couple thicknesses of vegtan leather from Tandy and got the gnarliest hides they had.
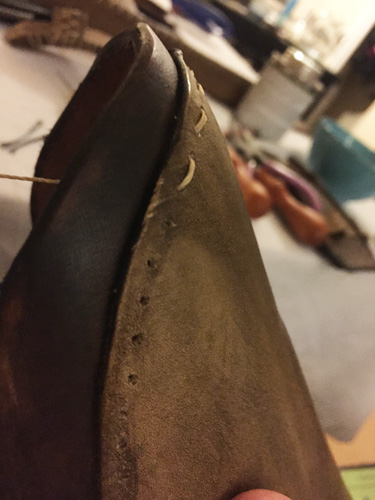 I mocked the pieces with craft foam, then cut out all the leather. I beveled the edges, but not too nicely or it would look odd. Some of the pieces needed to be wet molded to get the right curves. I used contact cement to get the various layers together. After all of that I used antiquing gel to color it and really get the imperfections to stand out. I did various levels of color by playing around with layering and watering it down so the different pieces would look like they’re from different sets. Then it was stitching time. This took forever! Experienced leather workers already know this stuff, but in order to stitch thick leather you have to use various guides for the stitch holes, hand punch the holes (which I used a single awl for) and then you can sew it very slowly by hand with waxed thread. I used a variety of stitching techniques, again to recreate different armor styles.
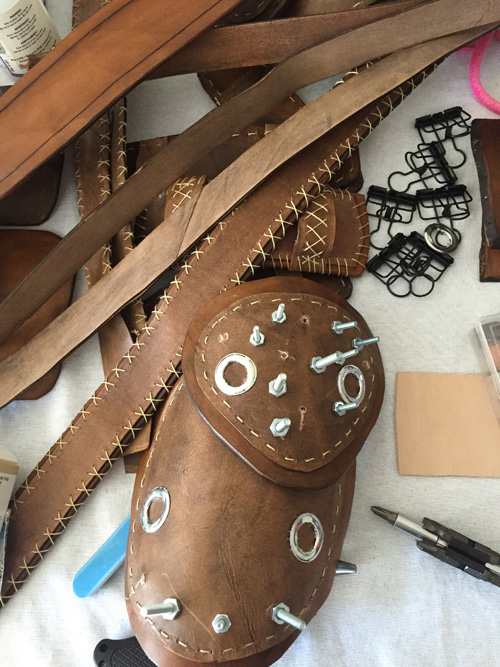 The metal decorative bits are a mixture of real screws and bolts, real rivets, fake stud rivets hammered in, furniture tacks hammered in, and various grommet sizes. The grommets for the belt were the worst. It took ages just to get one hole in. I’m not very strong and I’m super sensitive to trying not to bother my neighbors, so I only did just enough that I could get away with. Also my Dremel was my best friend for all the screws. All of the pouches have real snaps and are functional. All of the harness straps use functional snaps and rings. The way I attached the straps to the other pieces was admittedly not the best though, as I discovered while wearing at the con. I used contact cement and nailed in furniture tacks from behind. I was trying to avoid having the attachments show on the other side for accuracy. But that was dumb because A) some started to de-attach as I was walking, and B) there were already some rivet placements I could have cleverly used. Anyway, I learned some things.
Improvements
I’ll be wearing this again to DragonCon in September, so there are some improvements I’d like to make. Whether I get to these… we’ll see lol.
- -Lower the belt on the vaultsuit because it looks way too high on me. I can only lower it an inch or I’ll expose the waist seam, but I think it’ll help.
- -Weather the yellow trim to not look so bright. I didn’t want to weather the suit because I wanted that “fresh out of the vault” look, contrasting sharply with the armor. But the trim, it just looks too weird. Its too late to replace the trim with gold, but I can try to do something to it at least.
- -Maybe figure out a way to add more metal bits to the suit.
- -I ended up not finishing all of the leather pieces I made, like the left pauldron and arm guard, so I might finish those. It doesn’t really matter accuracy-wise since its all an original outfit, but I figure why not since I did the work.
- -Fix the stupid straps I mentioned. I’ve gotten a lot of feedback and know what to do to make it much better.
Check out Part 2 to see the rest!