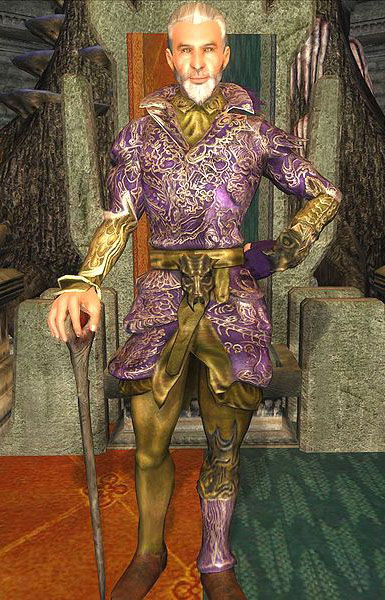
 I have been wanting to make Sheogorath’s regalia ever since I first played the Shivering Isles expansion for Oblivion (Elder Scrolls IV). It is obviously very complicated and a huge undertaking, so I could never really give myself an excuse to do it. However last year when trying to figure out what my big costume would be for Dragon Con and the Friday Night Costume Contest, I remembered this awesome outfit.
I wasn’t sure at first since he is an old dude, and I’m not old, or a dude. But then I envisioned myself wearing a long flowing silver wig and fancy makeup, and I finally decided to do it! This costume is technically “genderbent.” However it is also kind of canon to the Elder Scrolls lore. I’m not super into genderbending characters (I really enjoy when other people do it, but I feel kinda odd doing it myself), so it was important for me to tie it in with the lore. Every now and then in the games it is mentioned that the daedric princes choose which gender form to take on, and sometimes switch between them [source]. I thought who better to try being a lady than Sheogorath? If you know him it TOTALLY fits his character xD. I did want to create the outfit accurately so the only thing I really changed was my face and hair, the rest of the outfit is exactly the same as his.
This was a massive undertaking for me and took a lot of pre-planning and research. I had to decide how to do the embroidery (embroidery machine? hand stitching? painting it on?) and what kind of material to use for the base purple coat. I had to very carefully plan out every stage of construction BEFORE starting the embroidery to avoid getting too far and realizing I left something out. So the rest of the post is the process I decided on!
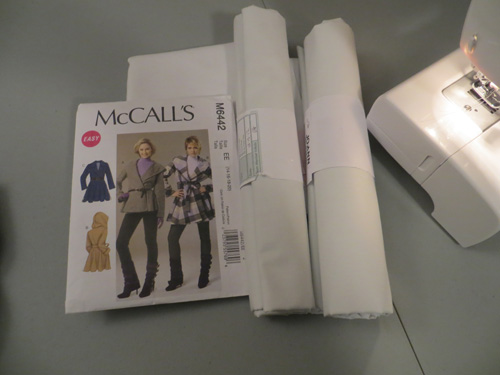 I started out with a very basic women’s coat pattern. I chose one that had a similar style collar and a separate bottom. I made the coat straight from the pattern out of duckcloth, then modified it by cutting and adding until it looked more like Sheogorath’s coat. For the bottom I just hung layers of cloth down and cut the petal shapes. Then I took that whole thing apart and re-made it exactly the way I would with the real coat, with the collar and sizing changes, lined bodice and bottom petals, etc.
It was very important to me to have as accurate to the source embroidery as possible. I took a ton of screenshots and used those as refs to draw out the designs onto my white duckcloth mock. This allowed me to get the proportions correct and figure out if I needed to modify it. For example, my torso is much shorter and thinner so I had to cut out a bit of the design. But except for that kind of thing, I added in every single little outline, stripe, tooth, etc. (At least I hope I did, I could have missed something here or there).
Then I took the whole thing apart and used those as my pattern pieces. I wasn’t sure what fabric to embroider on at first, but I eventually decided on silk dupioni. I saw someone post a pic of blue dupioni with gold embroidery, and I knew that was my material! Its prettty expensive, so I got mine at Joann’s since they have awesome coupons. all they had was a faux purple that was really red + blue fibers, so it created an iridescent effect. It was too wild for me so I ran it through purple dye. This was easier than dying white silk because you couldn’t tell if it spotted anywhere. :P The result was still iridescent, but a much better purple.
I fused it with a very light woven (after learning my lesson with non-woven) interfacing to keep it sturdy. Then I cut the pieces out with my mock pattern and backed it with tearaway stabilizer. I used the pencil drawings as a reference and drew out the designs onto the silk with white and grey tailors pencils. Then I used a light silky gold thread to satin stitch all of the designs. I went with satin stitching (with occasional hand finishing) since the design is too organic for an embroidery machine (I’m convinced it would be impossible to match everything up anyway), and painting wouldn’t look as good. The design isn’t pixel perfect, so I was really able to do it justice by literally just drawing on the silk with my machine. Getting the tension right was a nightmare though (constantly getting messed up), and I tossed several pieces before finding a good groove with my curves and circles, etc.
So for 3-4 months I took each piece one at a time and eventually finished all of the embroidery! Below is a gallery of all the pieces and their stages of completion. I will do the rest of the write-up in another post!


